
 Isaiah Parker
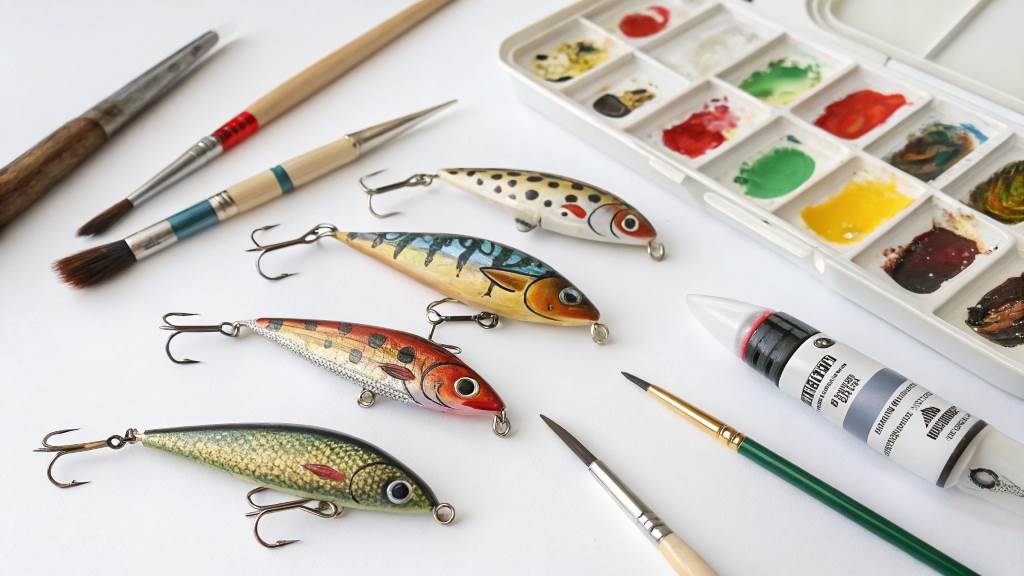
Micro fishing has gained popularity among anglers who enjoy the thrill of catching small fish with ultralight gear. One essential part of this niche hobby is customizing micro lures to enhance their appeal and effectiveness. Painting your own micro fishing lure painting techniques allows for creative expression, improved realism, and better performance in different fishing conditions.
This guide dives deep into DIY micro fishing lure painting techniques, offering step-by-step methods, pro tips, and expert insights to help you achieve professional-quality results. Whether you’re a beginner or an experienced angler, mastering these techniques will take your micro lure game to the next level.
Why Paint Your Own Micro Fishing Lures?
1. Customization for Better Performance
Store-bought lures are often mass-produced with generic color patterns. Painting your own micro lures lets you match the natural prey of fish in your area. Studies show that fish react differently to specific colors based on water clarity, light conditions, and prey availability.
For example:
- Bright colors like chartreuse and white work well in murky waters.
- Natural hues like brown, green, and silver are effective in clear water.
- UV-reflective paints can enhance visibility for fish in deep or shaded areas.
2. Cost-Effective and Fun
Customizing micro lures can save money in the long run. A high-quality painted lure from a store can cost $10–$20, whereas DIY painting allows you to create multiple designs at a fraction of the price. Plus, the process is enjoyable and rewarding.
3. Durability and Longevity
Factory-painted lures often lose their finish quickly. By applying high-quality paints, protective coatings, and sealants, you can extend the lifespan of your lures, ensuring they maintain their effectiveness over many fishing trips.
Essential Materials for Lure Painting
Before diving into fishing lure painting techniques, gather the necessary materials:
- Unpainted micro lures (plastic, wood, or metal)
- Acrylic or enamel paints (airbrush or hand-painted)
- Airbrush system or fine-tipped brushes
- Primer and base coat (for paint adhesion)
- Clear coat and epoxy sealer (for protection)
- Fine-grit sandpaper (for surface prep)
- Masking tape and stencils (for precise designs)
- Tweezers and hooks (to handle small lures without smudging)
Step-by-Step Guide to Painting Micro Lures
Step 1: Surface Preparation
Proper prep ensures the paint adheres well and lasts longer.
- Clean the Lure: Wipe the lure with rubbing alcohol to remove any oils or residues.
- Sand the Surface: Lightly sand the lure with fine-grit sandpaper (600–800 grit) to create a smooth surface for paint adhesion.
- Apply Primer: Spray or brush on a thin layer of primer. This helps the paint stick better and enhances color vibrancy. Let it dry completely.
Step 2: Applying a Base Coat
The base coat sets the foundation for your design.
- Choose a color that complements your final design.
- Apply a thin, even layer using an airbrush or brush.
- Allow it to dry before applying additional layers.
For realistic fish patterns, a white or silver base coat is ideal for achieving a natural look.
Step 3: Creating Realistic Color Patterns
Airbrush Technique for Smooth Blends
Airbrushing is the best way to achieve professional, lifelike results. It allows for smooth gradients and subtle color transitions.
- Start with light colors and build up to darker shades.
- Use thin layers to avoid overloading the lure with paint.
- Create fade effects by spraying from a distance and adjusting air pressure.
Hand-Painting Details
If you don’t have an airbrush, fine-tipped brushes can still create detailed patterns.
- Use dotting tools or toothpicks for adding small eyes and scales.
- Layer different colors with thin brush strokes for depth and realism.
Step 4: Adding Realistic Effects
- Scale Patterns: Use mesh or lace as a stencil and lightly spray over it for a natural scale effect.
- Stripes and Spots: Mimic natural baitfish by adding vertical stripes or random dark spots.
- UV and Glow Paints: Ideal for low-light fishing, these paints enhance visibility underwater.
Step 5: Sealing and Protecting Your Lure
- Apply a Clear Coat: This protects the paint from chipping. Use a thin layer of epoxy or UV resin.
- Cure Properly: Allow the lure to dry completely. Some sealants require UV light for curing.
- Attach Hooks and Eyes: Once dry, reattach split rings, hooks, and eyes carefully.
Pro Tips for Advanced Lure Painting
- Experiment with Color Shifts: Iridescent paints create a shimmering effect similar to real fish scales.
- Use Fine Details: Add red or orange accents near the gills to mimic injured baitfish, which can trigger predatory instincts.
- Test Lures in Water: Before fishing, test your lure in a bucket or clear water to see how it looks under real conditions.
Common Mistakes to Avoid during fishing lure painting
- Skipping Primer: Without primer, paint may peel off quickly.
- Applying Thick Paint Layers: This can result in an uneven finish and clog fine details.
- Rushing Drying Time: Let each layer fully dry before applying the next to avoid smudging.
Conclusion
DIY micro fishing lure painting is an enjoyable and rewarding hobby that enhances your fishing success. By mastering airbrushing, color blending, and sealing techniques, you can create custom lures that outperform store-bought alternatives. Whether you’re painting for fun or performance, these techniques will help you craft stunning, durable, and effective micro fishing lures.
Frequently Asked Questions (FAQs)
1. What is the best type of paint for micro fishing lures?
Acrylic and enamel paints work best. Airbrush acrylics provide smooth coverage, while enamel paints offer durability.
2. How do I make my painted lures last longer?
Use a high-quality primer, apply multiple thin coats, and finish with a clear epoxy or UV resin sealant for maximum durability.
3. Can I paint over old lures?
Yes, but sand them lightly and apply a primer before painting to ensure proper adhesion.
4. What’s the best way to create realistic fish scale patterns?
Use a mesh net or lace as a stencil while airbrushing for an authentic scale effect.
5. How long does it take for lure paint to dry?
Drying time varies by paint type. Acrylics dry in 20–30 minutes, while enamel paints may take several hours. Always allow sealants to cure fully.


