Nina Taylor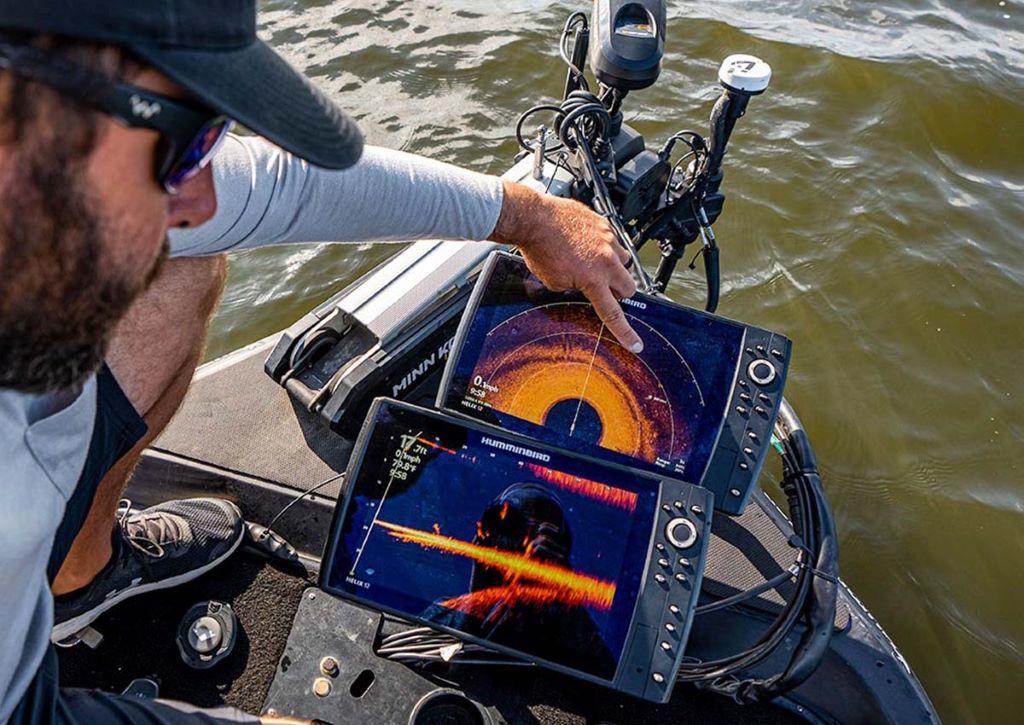
Fishing is a blend of art, patience, and technology. While experience and intuition play a huge role, modern tools like depth finders can give you a significant edge. A depth finder, also known as a fish finder, uses sonar technology to map the underwater terrain, locate fish, and measure water depth. Learning to read one effectively can transform your fishing trips from hit-or-miss outings into consistent successes.
I remember my early days of fishing, when I relied solely on luck and guesswork. My catch rate was unpredictable, and I often came home empty-handed. That all changed when I invested in a depth finder and learned how to interpret its readings. Suddenly, I could see the underwater world in real time, and my success rate skyrocketed.
In this guide, I’ll walk you through the basics of reading a depth finder so you can make the most of this powerful tool.
Why a Depth Finder is a Game-Changer
A depth finder provides real-time information about what’s happening beneath the surface of the water. It uses sonar waves to detect objects, including fish, vegetation, and the bottom contour. According to a study by Bassmaster, anglers who use depth finders catch up to 30% more fish than those who don’t. This is because they can identify productive fishing spots, avoid unproductive areas, and understand the behavior of the fish they’re targeting.
One of the biggest advantages of a depth finder is its ability to reveal the structure of the lake or riverbed. Fish often congregate around structures like drop-offs, weed beds, and submerged logs. By identifying these areas, you can target your casts more effectively and increase your chances of a successful catch.
For more insights on how to get the most out of your depth finder, check out these depth finder tips. These tips can help you understand the nuances of sonar technology and improve your fishing strategy.
However, a depth finder is only as good as your ability to interpret its readings. Without knowing how to read the display, you might as well be fishing blind. Therefore, learning the basics of sonar interpretation is essential.
Understanding the Basics of Sonar Technology
Sonar, which stands for Sound Navigation and Ranging, works by sending sound waves (or pings) into the water and measuring the time it takes for the echoes to return. The depth finder then uses this information to create a visual representation of the underwater environment on its display.
The display typically shows a graph with depth on the vertical axis and time (or distance) on the horizontal axis. The strength of the returning echo determines the intensity of the mark on the screen. Stronger echoes, such as those from a solid bottom or large fish, appear as thicker or brighter lines, while weaker echoes, like those from soft vegetation, appear as thinner or dimmer lines.
Most depth finders use one of two types of sonar: 2D sonar or Down Imaging/ Side Imaging. 2D sonar provides a traditional, wide-cone view of the water column directly beneath your boat. Down Imaging and Side Imaging, on the other hand, offer more detailed, photo-like images of the bottom and structures to the sides of your boat. According to Outdoor Life, these advanced imaging technologies can reveal details like individual rocks, brush piles, and even the shape of fish.
Understanding the type of sonar your depth finder uses is the first step in interpreting its readings. Each type has its strengths and is suited to different fishing scenarios.
Interpreting the Depth Finder Display
The display of a depth finder can look intimidating at first glance, but once you understand the basics, it becomes much easier to read. The most common display is the traditional 2D sonar graph, which shows a cross-section of the water column beneath your boat.
The bottom of the water body appears as a thick line at the bottom of the screen. The depth is usually marked on the left or right side of the display. Fish appear as arches or blips on the screen, with the size and shape of the arch indicating the size and behavior of the fish. Larger fish typically produce larger, more pronounced arches, while smaller fish may appear as small dots or dashes.
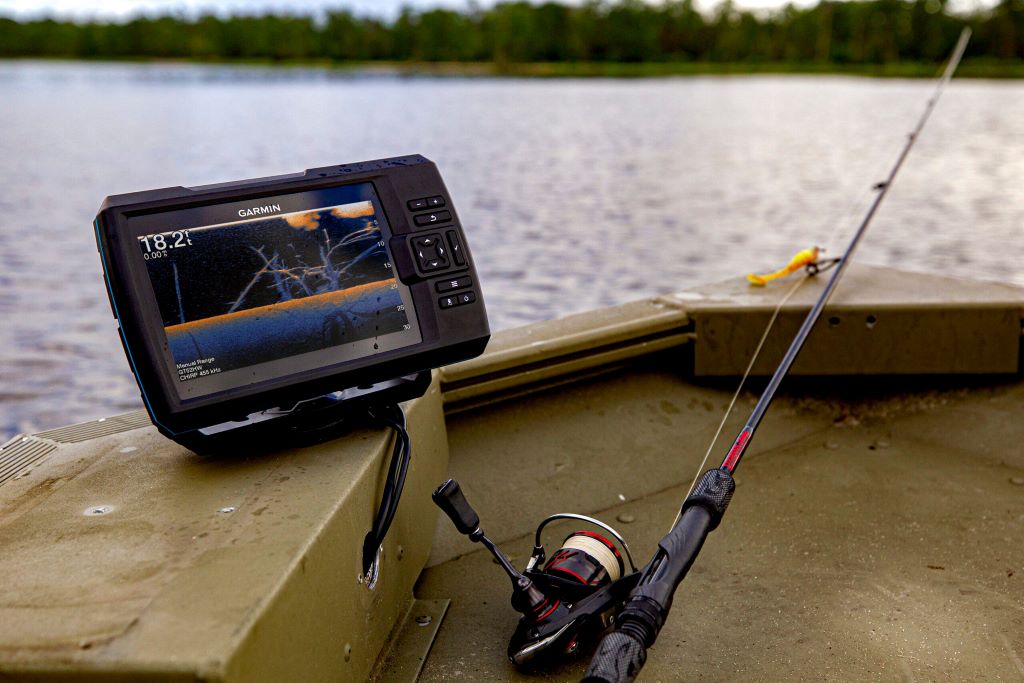
Vegetation and other structures, like rocks or logs, appear as irregular lines or clusters between the surface and the bottom. Weed beds often show up as thick, fuzzy lines, while hard structures like rocks or man-made objects appear as solid, well-defined lines.
Additionally, pay attention to the color of the marks on the screen. Many depth finders use color to indicate the strength of the echo. For example, red or orange marks may indicate strong echoes from dense objects like fish or rocks, while blue or green marks may indicate weaker echoes from softer materials like vegetation or silt.
Identifying Fish and Structures
One of the most exciting aspects of using a depth finder is identifying fish and underwater structures. Fish typically appear as arches on the display, with the height of the arch indicating the size of the fish. A tall, wide arch usually means a large fish, while a short, narrow arch suggests a smaller one.
The position of the arch on the screen also provides clues about the fish’s behavior. If the arch is close to the bottom, the fish is likely resting or feeding near the lakebed. If the arch is higher up in the water column, the fish may be suspended or actively swimming.
Underwater structures are equally important to identify, as they often attract fish. Drop-offs, which are sudden changes in depth, appear as steep slopes on the display. Weed beds show up as thick, fuzzy lines, while rocks or logs appear as solid, irregular shapes. According to Field & Stream, fish are more likely to congregate around structures that provide cover and ambush points for prey.
Additionally, look for bait balls, which appear as dense clusters of small marks on the screen. Bait balls indicate schools of baitfish, which often attract larger predator fish like bass, pike, or walleye. If you see a bait ball, it’s a good sign that there are larger fish nearby.
Using Depth Finders in Different Fishing Scenarios
Depth finders are versatile tools that can be used in a variety of fishing scenarios, from freshwater lakes to saltwater flats. In freshwater, depth finders are particularly useful for locating structure like weed beds, drop-offs, and submerged timber. These areas are prime spots for species like bass, crappie, and walleye.
In saltwater, depth finders can help you locate reefs, wrecks, and other structures that attract fish like snapper, grouper, and kingfish. They’re also useful for identifying baitfish schools and tracking the movement of predator fish.
For ice fishing, depth finders can be a game-changer. They allow you to see fish and structure beneath the ice without drilling multiple holes. Look for a depth finder with a portable, battery-powered design that’s easy to move from hole to hole.
Additionally, depth finders can be used for trolling. By monitoring the depth and location of fish, you can adjust your trolling speed and depth to target specific species. According to In-Fisherman, trolling with a depth finder can increase your catch rate by helping you stay in the strike zone.
Adjusting Settings for Optimal Performance
To get the most out of your depth finder, it’s important to adjust the settings based on the conditions and the type of fishing you’re doing. The sensitivity setting, for example, controls how much detail the sonar picks up. A higher sensitivity setting will show more detail but may also pick up more clutter, while a lower sensitivity setting will show less detail but provide a cleaner image.
The depth range setting determines how much of the water column the depth finder displays. In shallow water, a shallow depth range will provide more detail, while in deep water, a deeper range will give you a broader view. Additionally, the zoom feature allows you to focus on a specific depth range, which can be useful for targeting fish that are suspended at a particular depth.
The colorline setting is another important adjustment. This setting controls the color threshold for the sonar echoes. By adjusting the colorline, you can make it easier to distinguish between different types of echoes, such as fish, vegetation, and the bottom.
Finally, consider the frequency setting. Most depth finders use either 50 kHz, 83 kHz, 200 kHz, or 455 kHz frequencies. Lower frequencies (50 kHz and 83 kHz) provide wider coverage and deeper penetration, making them ideal for deep water or large areas. Higher frequencies (200 kHz and 455 kHz) provide more detail and better resolution, making them ideal for shallow water or targeting small fish.
Common Mistakes to Avoid
While depth finders are powerful tools, they’re not foolproof. One of the most common mistakes anglers make is misinterpreting the display. For example, it’s easy to mistake a school of baitfish for a large fish or confuse vegetation with a solid structure. To avoid this, take the time to learn how different objects appear on the screen and practice interpreting the readings in various conditions.
Another common mistake is ignoring the settings. As mentioned earlier, adjusting the sensitivity, depth range, and other settings can significantly improve the performance of your depth finder. Failing to adjust these settings based on the conditions can result in a cluttered or unclear display.
Additionally, many anglers make the mistake of relying too heavily on the depth finder. While it’s a valuable tool, it’s not a substitute for experience and intuition. Use the depth finder to supplement your knowledge of the water and the behavior of the fish you’re targeting.
Finally, avoid the mistake of not maintaining your depth finder. Regularly clean the transducer, which is the part of the depth finder that sends and receives sonar signals. Dirt, algae, or other debris on the transducer can interfere with its performance. Additionally, ensure the transducer is properly mounted and aligned for the best results.
Conclusion
Reading a depth finder effectively can take your fishing trips to the next level. By understanding the basics of sonar technology, interpreting the display, and adjusting the settings for optimal performance, you can locate fish and structures with precision and confidence.
I’ve seen firsthand how a depth finder can transform a fishing trip. What was once a game of chance has become a strategic pursuit, with each outing offering new insights into the underwater world. With practice and patience, you too can master the art of reading a depth finder and enjoy more successful fishing trips.
Now it’s your turn. Grab your depth finder, hit the water, and start exploring the hidden world beneath the surface. If you have your own tips or experiences, share them in the comments below. And if you found this guide helpful, don’t forget to share it with your fellow anglers!
FAQs
How do I know if my depth finder is working correctly?
Check the display for a clear, consistent bottom reading. If the bottom line is jagged or inconsistent, there may be an issue with the transducer or settings. Additionally, test the depth finder in known depths to ensure accuracy.
What is the best frequency for shallow water fishing?
For shallow water fishing, a higher frequency like 200 kHz or 455 kHz is ideal. These frequencies provide more detail and better resolution, making it easier to identify fish and structures in shallow water.
How do I distinguish between fish and vegetation on my depth finder?
Fish typically appear as arches or blips on the screen, while vegetation shows up as thick, fuzzy lines. Fish arches are usually more defined and move across the screen, while vegetation remains stationary.
Can I use a depth finder in saltwater?
Yes, depth finders work in both freshwater and saltwater. However, saltwater can be more challenging due to factors like waves, currents, and deeper depths. Ensure your depth finder is rated for saltwater use and adjust the settings accordingly.
How do I maintain my depth finder?
Regularly clean the transducer to remove dirt, algae, or other debris. Ensure the transducer is properly mounted and aligned. Additionally, check the battery and connections to ensure everything is in working order.