Nina Taylor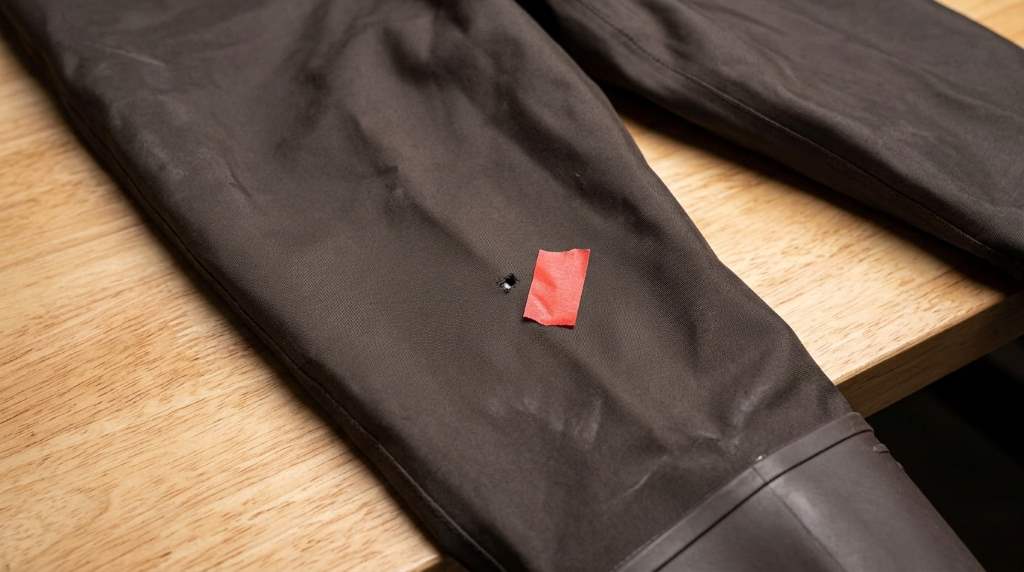
A TideWe bootfoot chest wader can usually be patched at home when a small puncture or tear causes a leak. First, find the leak, clean and dry the area, then apply the correct wader patch with compatible adhesive.
Modern TideWe waders use different materials, including neoprene and breathable waterproof nylon. Some breathable models provide a 20,000 mm waterproof rating, so proper patch preparation matters for maintaining the seal.
If you own a Tidewe bootfoot chest wader, a careful repair can extend its useful life. However, large tears, damaged boots, or failed seams may require professional service instead.
Why TideWe Waders Need the Right Repair Method
TideWe makes several bootfoot chest wader designs, and each model can use different outer materials. For example, some hunting models use 3.5 mm neoprene with bonded seams, while breathable models use layered nylon fabric.
Therefore, do not treat every leak with the same patch material. A repair kit designed for neoprene may not provide the best bond on breathable fabric.
Also, avoid stitching a small waterproofing failure unless the manufacturer specifically recommends that method. Needle holes can create additional paths for water to enter the wader.
What You Need Before Patching
Gather everything before you start the repair. A clean work area also helps you avoid contaminating the adhesive or patch surface.
- Compatible wader repair patch
- Manufacturer recommended repair adhesive
- Rubbing alcohol or mild soap
- Clean water
- Soft cloth or sponge
- Paper towel
- Small scissors
- Flat repair surface
- Heavy object for temporary pressure
- Clean water for leak testing
TideWe states that some breathable waders include hole repair kits and recommends patching them from the outside. The patch should use suitable material and adhesive for the wader fabric.
Step 1: Find the Exact Leak
Start by inspecting the entire wader instead of immediately applying a patch. Small punctures often hide around knees, seats, lower legs, and high wear areas.
Turn the wader inside out and examine the suspected area under bright light. Look for pinholes, cuts, worn fabric, separated seams, and damaged waterproof tape.
If the leak remains difficult to locate, use a controlled water test. Add a small amount of water inside the affected section and watch the outside for moisture.
Mark every leak with a washable marker or small piece of removable tape. Then empty the water and allow the wader to dry completely before continuing.
Step 2: Clean the Damaged Area
Cleanliness plays a major role in patch durability. Dirt, oil, mud, and moisture can prevent the adhesive from forming a strong bond.
Wash the affected area with mild soapy water when appropriate for the material. Rinse away residue and dry the surface completely with a clean cloth.
For compatible materials, you can use a small amount of rubbing alcohol to remove surface oils. However, test an inconspicuous area first and follow the adhesive manufacturer’s directions.
Never apply adhesive over wet fabric. Even a small amount of trapped moisture can weaken the repair and create another leak.
Step 3: Select the Correct Patch Material
Match the patch material to the wader construction before cutting anything. Neoprene waders need a repair approach suited to neoprene, while breathable nylon needs a compatible waterproof patch.
TideWe uses neoprene construction in several bootfoot models, including designs with sealed or taped seams. Other models use waterproof breathable nylon with taped or welded seam construction.
Check your exact model before using an adhesive or patch. If your waders came with a repair kit, use those materials whenever possible.
Step 4: Cut a Properly Sized Patch
Cut the patch so it extends beyond the damaged area on every side. A patch that barely covers the hole can peel away as the fabric flexes during movement.
Round the corners before installation because rounded edges reduce the chance of accidental lifting. Keep the patch large enough to cover the entire damaged section with extra material around it.
For a long tear, avoid stretching the patch during installation. Let the patch sit naturally over the fabric so normal movement does not pull against the repair.
Step 5: Apply the Adhesive Carefully
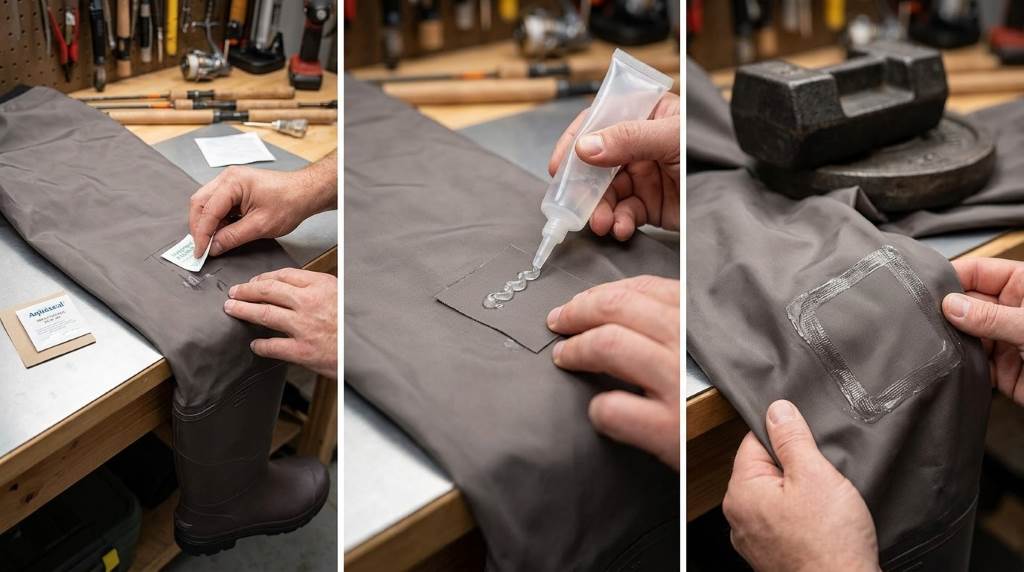
Apply the recommended adhesive according to its instructions. Spread an even layer across the patch contact area without creating excessive buildup.
Keep adhesive away from zippers, buckles, boot openings, and areas that need to flex freely. Excess adhesive can create stiff spots and interfere with normal wader movement.
Next, position the patch directly over the damaged section. Press it firmly from the center toward the outer edges to remove trapped air.
Check every edge before leaving the patch to cure. If an edge lifts immediately, reposition it rather than assuming the adhesive will fix the problem later.
Step 6: Hold the Patch Flat
Keep steady pressure on the patch while the adhesive begins bonding. Follow the adhesive manufacturer’s recommended curing time instead of relying on appearance.
You can place a clean flat object over the repair when the adhesive instructions allow pressure. Use a barrier between the repair and the object to prevent accidental sticking.
Do not fold the wader around the repair while the adhesive cures. A flat position helps maintain even contact across the entire patch.
Step 7: Let the Repair Cure Completely
Do not rush the curing process because the patch looks secure. The adhesive needs enough time to develop its intended bond strength.
Keep the repaired wader in a clean, dry, ventilated location. Avoid direct heat from heaters, hair dryers, or other high temperature sources unless the adhesive instructions specifically allow it.
After curing, inspect the patch from every angle. Look for bubbles, loose edges, wrinkles, gaps, or areas where adhesive failed to contact the fabric.
Step 8: Test the Wader Before Wearing It
Always test a repaired wader before entering deep or moving water. A short controlled test can reveal problems before they become serious.
Start with a small amount of water around the repaired area. Watch closely for moisture appearing through or around the patch.
Next, gently flex the repaired section several times. The patch should remain attached without lifting, cracking, or separating at the edges.
If the repair passes the first test, perform another longer test. Give the repair enough exposure to confirm that water does not slowly migrate through a tiny opening.
How to Patch Different TideWe Wader Materials
Neoprene Waders
Neoprene requires a flexible repair that can move with the material. Clean the surface carefully and use an adhesive specifically intended for neoprene or wader repair.
Several TideWe neoprene models use bonded and sealed seam construction. Therefore, inspect nearby seams when a leak appears close to a stitched area.
Breathable Nylon Waders
Breathable nylon requires a waterproof patch that matches the fabric system. TideWe specifically recommends outside patching for holes in its breathable waders.
Keep the repair area clean and completely dry before applying the patch. Also, avoid using an adhesive that could damage the breathable membrane or outer coating.
Seam Leaks
A seam leak differs from a simple puncture because the waterproof barrier may have failed along a longer line. Inspect the seam tape and surrounding fabric before applying any repair.
If the seam has widespread separation, a small patch may provide only temporary protection. In that situation, manufacturer service can provide a more reliable repair.
When You Should Not Patch the Wader Yourself
Home repair works best for small punctures, minor cuts, and isolated holes. Larger structural damage requires a more careful assessment before you return the wader to service.
- Large tears across stressed areas
- Major seam separation
- Boot separation
- Extensive fabric deterioration
- Damaged waterproof zippers
- Repeated leaks around one repair
- Multiple large patches across the same section
TideWe warranty terms vary by model, and some current waders offer longer repair coverage than others. Unauthorized repairs can also affect warranty coverage, so check your model’s current warranty terms before making a permanent modification.
Common Patching Mistakes to Avoid
Many failed wader repairs happen because users rush preparation rather than because the patch itself lacks quality. Avoid these common mistakes to improve your repair results.
- Applying adhesive to wet fabric
- Using an incompatible patch
- Leaving dirt under the patch
- Cutting the patch too small
- Using sharp square patch corners
- Testing the wader before curing finishes
- Applying excessive adhesive
- Ignoring nearby seam damage
Additionally, never assume that stopping visible water automatically solves the underlying problem. Inspect the surrounding material because abrasion can create several nearby weak points.
How to Prevent Future Wader Leaks
Good maintenance can reduce the need for repeated patches. Clean the waders after muddy trips and allow them to dry fully before storage.
Inspect the knees, seat, lower legs, seams, and boot connections after demanding trips. Early detection lets you repair small damage before it becomes a larger tear.
Store the wader in a cool, dry place away from sharp tools and rough surfaces. Also, avoid folding it tightly around the same area for long periods.
TideWe recommends cleaning breathable waders with soapy water, rinsing them, and allowing them to dry. Proper cleaning also makes future leak inspections easier.
How Long Can a Wader Patch Last?
A properly installed patch can last through repeated use, but its lifespan depends on damage location and material. High flex areas usually place more stress on repairs than low movement sections.
Therefore, inspect every repair before each major fishing or hunting trip. Replace or reinforce a repair when the edges begin lifting or the surrounding fabric shows new damage.
When Professional Repair Makes More Sense
Professional service makes sense when damage affects critical waterproof barriers or complicated components. It also makes sense when your wader remains under warranty.
TideWe currently provides repair services for eligible products, while coverage and repair terms depend on the specific model. The company also states that returned waders for warranty or repair should arrive clean.
Before sending a wader for service, document the damaged area with clear photographs. Keep your purchase information available and check the current instructions for your exact model.
Final Leak Test Checklist
Before returning to the water, run through a simple inspection checklist. This final step can prevent an easy repair from becoming an uncomfortable field problem.
- Confirm the patch fully covers the hole.
- Check every patch edge for lifting.
- Confirm the adhesive has fully cured.
- Flex the repaired area gently.
- Test the wader with controlled water exposure.
- Inspect nearby seams for additional leaks.
- Dry the wader completely after testing.
If everything remains dry, your repair should be ready for normal use. Still, carry a small compatible repair kit on longer trips so you can address unexpected damage quickly.
Conclusion
Learning how to patch a TideWe bootfoot chest wader can save time and extend the useful life of your gear. Find the leak, clean the surface, match the patch to the material, apply compatible adhesive, and allow full curing.
For the best result, test every repair before entering deep water and inspect the surrounding fabric for additional damage. If your wader has major seam, boot, or zipper damage, check TideWe’s current repair and warranty options before attempting a permanent fix.
Use this process on your next small leak, and make a proper repair kit part of your regular fishing or hunting gear.
FAQs
Can I patch a TideWe wader at home?
Yes, you can patch many small punctures and tears at home with compatible repair materials.
What should I use to patch a neoprene TideWe wader?
Use a flexible patch and adhesive specifically designed for neoprene or wader repair.
Can I patch breathable TideWe waders?
Yes, TideWe recommends using the proper patch material and adhesive on the outside of breathable waders.
How do I find a tiny wader leak?
Use bright lighting and a controlled water test to locate small punctures or damaged seams.
Should I repair a wader under warranty?
Check the current warranty terms first because unauthorized repairs may affect coverage.