Nina Taylor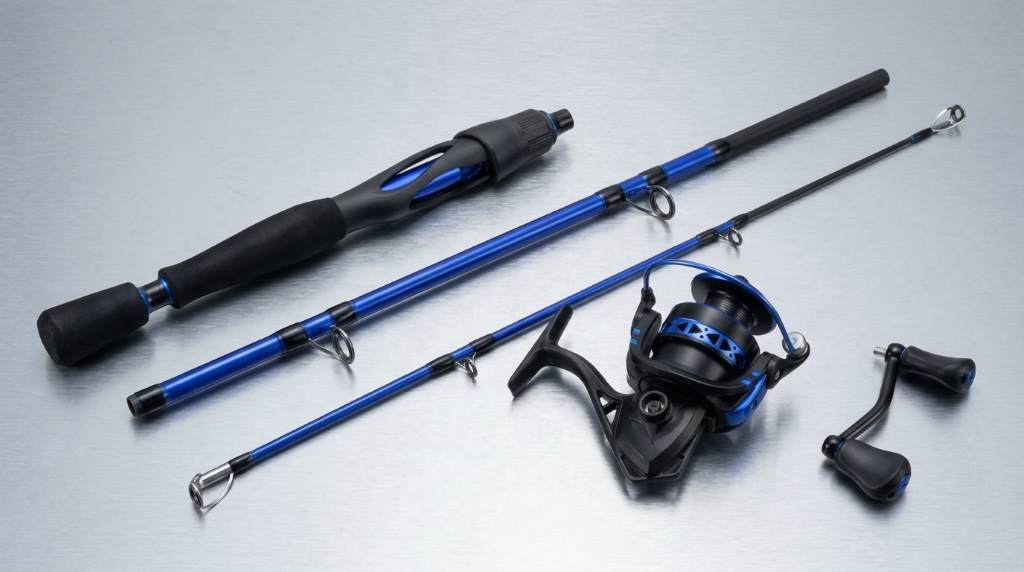
Setting up a KastKing Centron Rod Reel Combo takes only a few basic steps. Assemble the two piece rod, mount the spinning reel, spool the line evenly, and test the drag before casting. The current Centron combo uses a 5.2:1 reel ratio and comes in several rod lengths and powers for different fishing styles.
If you want a practical reference before starting, the KastKing Centron Rod Reel Combo can help you understand the setup. However, proper assembly matters just as much as the equipment itself. A few minutes spent checking alignment and line tension can prevent tangles and poor casting later.
Key Takeaways
- Join both rod sections firmly without forcing the connection.
- Seat the Centron reel evenly inside the rod’s reel seat.
- Match the fishing line with the rod and reel size.
- Keep steady tension while loading line onto the spool.
- Fill the spool without packing line beyond its rim.
- Set the drag before attaching your lure or bait.
- Make a short test cast before fishing at full distance.
Check the Combo Before Assembly
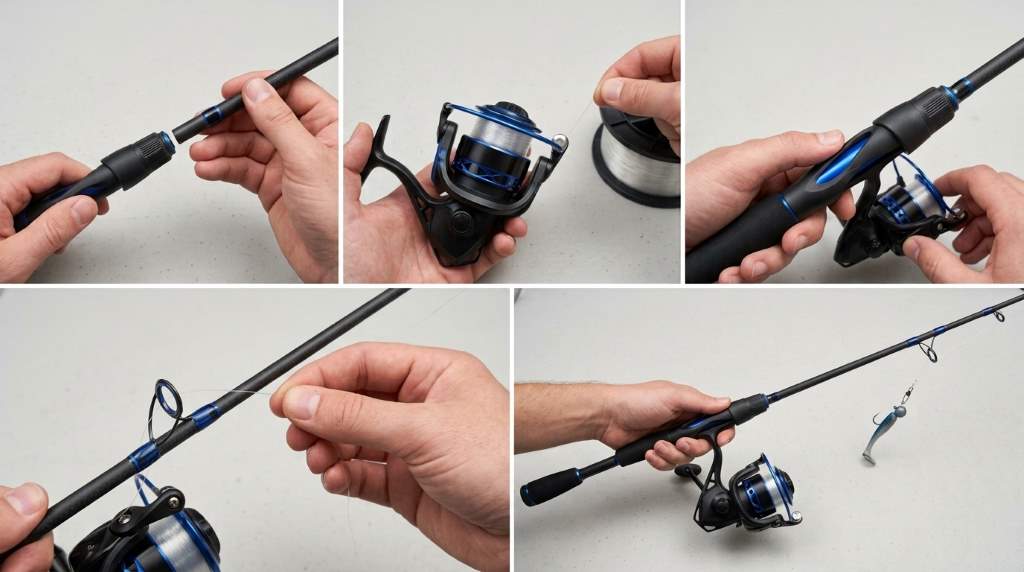
Start by placing every component on a clean surface. You should have the two rod sections, Centron spinning reel, reel handle, and any included accessories.
Next, inspect the rod guides for cracks, loose inserts, or visible damage. Also check the reel foot, bail, spool, handle, and drag knob before putting everything together.
The Centron spinning combo uses a two piece rod design across its current range. KastKing offers different lengths and power ratings, so the correct setup depends on the exact combo you purchased.
Match the Rod Sections Correctly
Lay the rod sections beside each other and identify the thicker butt section first. The thinner section contains the upper guides and rod tip.
Insert the upper section into the lower section with gentle pressure. Stop when the connection feels secure and never twist aggressively to force the pieces together.
After assembly, look down the rod from the handle toward the tip. The guides should form a reasonably straight path without obvious sideways misalignment.
Attach the Centron Reel to the Rod
Hold the rod with the reel seat facing upward. Then loosen the reel seat locking section enough to slide the reel foot into position.
Place the reel foot fully inside the reel seat. Keep the reel beneath the rod because the Centron is a spinning reel designed for this orientation.
Now tighten the reel seat until the reel feels secure. Avoid excessive force because overtightening can damage components or make later adjustments difficult.
Finally, hold the rod naturally and confirm that the reel sits comfortably beneath your hand. A stable connection should eliminate noticeable movement between the reel and rod.
Install the Reel Handle
Most anglers can set the handle for the side that feels natural. The Centron spinning reel supports a reversible handle arrangement on applicable models.
Insert the handle into the correct side and turn it until the threads engage smoothly. Tighten it firmly, but avoid forcing the mechanism beyond normal hand pressure.
Turn the handle several times after installation. The rotor should move smoothly while the bail rotates around the spool without unusual grinding or resistance.
Choose and Prepare Your Fishing Line
Line selection should follow the rod’s printed line rating and your intended fishing technique. Do not automatically use the strongest line available because heavier line can reduce casting performance.
Monofilament offers simple handling and works well for many beginner setups. Braided line provides a thinner diameter for its strength, while fluorocarbon often works as a leader material.
For example, lighter Centron sizes suit lighter freshwater presentations, while larger models support heavier applications. Current Centron specifications span reel sizes from 2000 through 5000 within the combo range.
Prepare the Spool
Open the bail before attaching line to the spool. Then pass the line through the rod guides, starting with the largest guide near the reel.
Wrap the line around the spool and secure it with a suitable arbor knot. Pull the knot tight and trim the loose tag end carefully.
Close the bail after securing the line. Keep the line under light tension while you begin winding it onto the spool.
Spool the Line Without Creating Tangles
Place the line source where it can unwind naturally as you turn the reel handle. Maintain consistent tension with your fingers while the line travels onto the spool.
Reel slowly at first and watch how the line stacks. The line should spread across the spool rather than forming a mound on one side.
Continue winding until the spool reaches an appropriate fill level. A common setup guide recommends stopping about one eighth inch below the spool rim.
Do not overfill the spool because excess line can jump off during casting. Underfilling also reduces casting distance because the line leaves the spool less efficiently.
Check the Line Lay
Stop occasionally and inspect the spool from the side. Look for uneven ridges, loose loops, or sections where the line crosses itself excessively.
If the line stacks unevenly, slow down and check your tension. You should also confirm that the line passes cleanly through every rod guide.
A clean line lay gives the reel a better starting point for smooth casting. It also reduces unnecessary loops that can develop during repeated retrieves.
Set the Bail and Drag Correctly
The bail controls line release during a cast, while the drag controls how easily line leaves the spool under pressure. Understanding both controls makes the first fishing session much easier.
Open the bail before casting and close it after the lure lands. Manually closing the bail can help prevent unnecessary line management problems on spinning reels.
The drag knob sits on the front of the spool. Turn it clockwise to increase resistance and counterclockwise to reduce resistance.
Test the Drag Before Fishing
Pull the line steadily by hand after attaching the reel. The line should release smoothly without sudden sticking or violent jerking.
Do not tighten the drag completely simply because you want maximum stopping power. The correct setting depends on your line, target species, lure, and fishing environment.
As a practical starting point, many spinning reel guides suggest setting drag around one quarter to one third of the line’s breaking strength. Then adjust it after testing the actual setup.
Thread the Line Through Every Guide
Starting at the reel, pass the line through each rod guide one at a time. Finish by passing the line through the small tip guide at the end.
Keep the bail closed while threading the guides after spooling. Leave enough free line beyond the rod tip to attach your lure or terminal tackle comfortably.
Before attaching anything, run your fingers lightly along the line. This simple check can reveal knots, damaged sections, or unexpected loops before they become casting problems.
Attach Your Lure or Bait
Select terminal tackle that fits the rod’s lure rating. The current Centron range includes combinations with different lure and line ratings, so check your specific model rather than guessing.
Tie the lure using a knot appropriate for your chosen line. Leave a small tag end so the knot remains secure without creating unnecessary bulk.
After tying, pull the connection firmly by hand. A secure knot should hold without slipping or cutting deeply into the line.
Balance the Setup Before Casting
Hold the assembled combo in your normal fishing position. Your grip should feel stable without requiring excessive pressure from your wrist or fingers.
Then check the rod’s balance around the reel seat. A comfortable setup helps you maintain control during repeated casting and retrieving.
Current Centron rods use IM6 graphite blanks and EVA handles, with different handle configurations across the range. Those design differences affect how each combo feels during extended use.
Make a Controlled First Cast
Start with a clear area and a lightweight practice lure within your rod’s rating. Keep the first cast short instead of immediately trying to reach maximum distance.
Open the bail and hold the line against the rod with your index finger. Bring the rod backward, then move it forward while releasing the line smoothly.
Point the rod toward your target as the lure travels. Once the lure reaches the water, close the bail and begin retrieving with controlled tension.
Check These Four Things After Casting
- Watch whether the line leaves the spool smoothly.
- Listen for unusual reel noise during retrieval.
- Check whether the line creates loose loops around the spool.
- Confirm that the lure tracks naturally during retrieval.
If everything works normally, make another cast and gradually increase distance. This approach lets you correct setup problems before they become difficult to diagnose.
Fix Common Centron Setup Problems
Line Jumps Off the Spool
Excessive line usually causes this problem. Remove enough line to restore a small gap below the spool rim.
Line Forms Large Loops
Large loops often indicate poor tension, incorrect spool filling, or line twist. Check the line lay first and make sure the bail closes properly after each cast.
Reel Feels Loose
A loose reel usually points to an insufficiently tightened reel seat. Stop fishing and secure the reel before applying more pressure to the rod.
Drag Feels Too Tight
Turn the drag knob counterclockwise and test the line again. The drag should release line progressively instead of locking the spool completely.
Casting Distance Seems Short
Check the spool fill level and line diameter first. Also inspect the rod guides for damage and confirm that the lure falls within the rod’s recommended range.
A Simple Pre Fishing Checklist
| Check | What to Confirm |
|---|---|
| Rod connection | Both sections fit securely and guides align properly. |
| Reel seat | The reel sits firmly without noticeable movement. |
| Handle | The handle turns smoothly and remains secure. |
| Line | The line matches the rod rating and sits evenly. |
| Spool | Line remains slightly below the spool rim. |
| Bail | The bail opens and closes smoothly. |
| Drag | Line releases smoothly under steady hand pressure. |
| Lure | The lure stays within the rod’s recommended rating. |
How to Keep the Combo Ready for Future Trips
After fishing, remove dirt and moisture from the rod and reel. Pay particular attention to the reel exterior, guides, handle, and line.
Do not store the rod with unnecessary tension on the line. Loosen or remove the terminal tackle before transporting the combo to prevent accidental damage.
Keep the reel protected from unnecessary impacts during storage. Regular inspection also helps you notice loose guides, worn line, or changes in reel operation before your next trip.
Frequently Asked Questions
How do I put line on a KastKing Centron reel?
Open the bail, secure the line to the spool, maintain light tension, and wind the line evenly below the spool rim.
Which direction should the Centron reel face?
The spinning reel should sit beneath the rod with the spool facing forward toward the rod tip.
How full should a Centron spool be?
Fill the spool close to the rim while leaving a small gap to prevent excess line from spilling during casts.
Why does my Centron reel create line loops?
Line loops can result from overfilling, poor line tension, line twist, or improper bail operation.
Should I set the drag before fishing?
Yes, set and test the drag before casting so the reel releases line smoothly when pressure increases.
Final Setup Advice
A properly assembled Centron combo should feel secure, balanced, and predictable before you make your first serious cast. Take time to inspect the rod connection, line lay, bail, drag, and lure rating.
Most setup problems become easier to solve when you test one component at a time. Follow this process before your next fishing trip, then make small adjustments based on casting performance and line behavior.
For the best results, keep the setup simple until you understand how your specific Centron model behaves. Once everything works smoothly, you can fine tune your line, leader, lure, and drag for the species you target.