Nina Taylor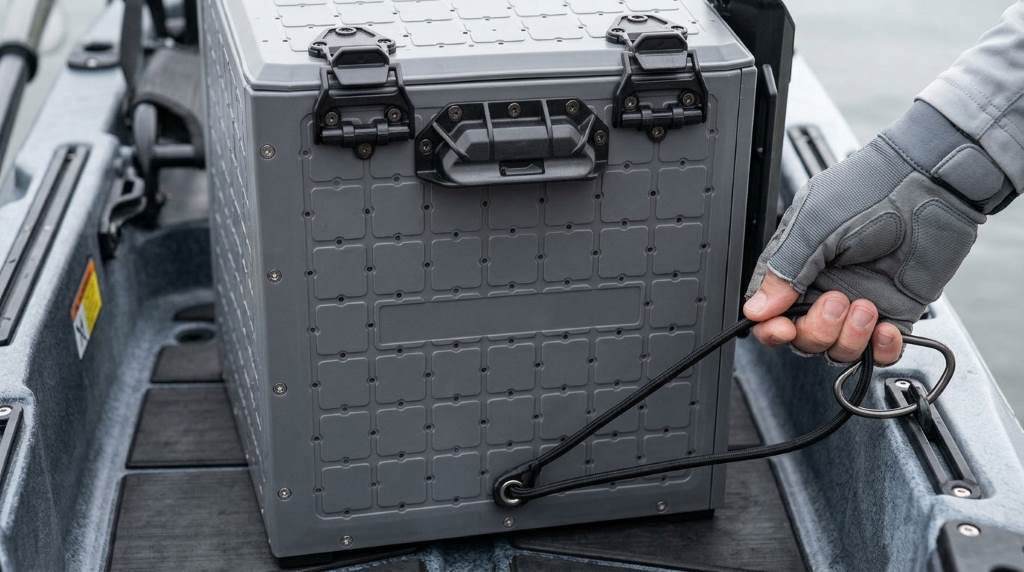
A YakAttack BlackPak Pro Fishing Crate works best when you build it around your fishing style. Start by assembling the panels, positioning the TetherTube holders, organizing tackle, and securing the crate inside your kayak. Depending on the model, the crate measures about 13 to 16 inches wide and weighs roughly 7 to 12 pounds with included rod holders. Those dimensions make careful tankwell measurement important before installation. With the right layout, the BlackPak Pro keeps rods, tackle, tools, and small accessories within easy reach while reducing clutter on your kayak.
Key Takeaways:
- Measure your kayak tankwell before selecting the BlackPak Pro size.
- Assemble the interlocking panels with the included stainless steel hardware.
- Position TetherTube rod holders around your actual casting and paddling needs.
- Use compatible tackle boxes to create a predictable storage system.
- Secure the crate through its corner attachment points before launching.
- Keep frequently used tools accessible without overcrowding the crate.
- Inspect hardware, latches, tethers, and mounting points regularly.
Start With the Right BlackPak Pro Size
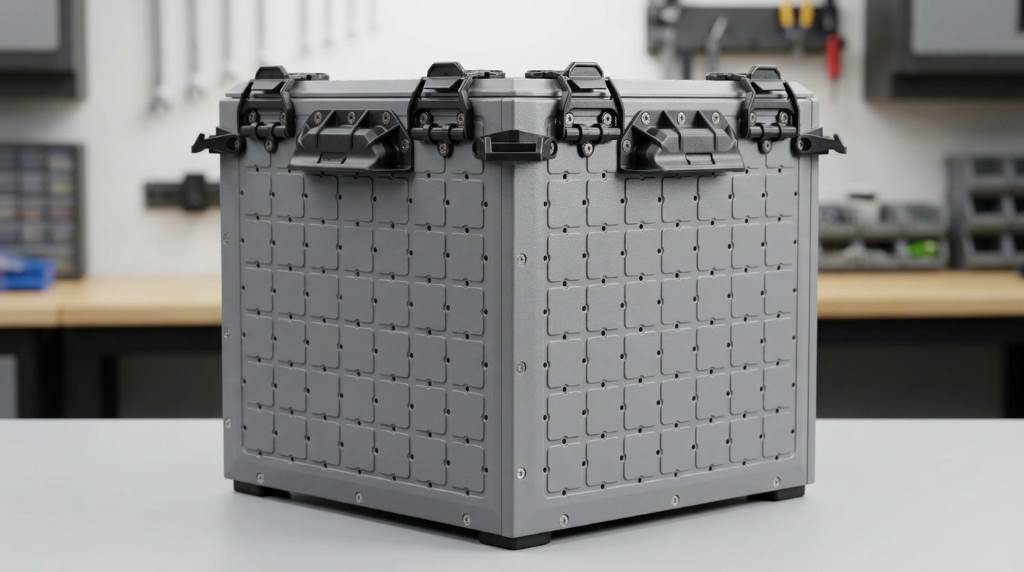
Before assembling anything, measure the kayak tankwell where the crate will sit. Measure both the opening and usable depth because a crate can fit the opening but interfere with other gear.
Also account for the space needed by the TetherTube holders. YakAttack recommends adding 2.75 inches for each side where you plan to mount TetherTubes. Therefore, measure the complete operating footprint rather than the crate body alone.
Match the Crate to Your Tackle System
The 13 by 13 model suits anglers who want a compact footprint and smaller tackle boxes. It supports 3600 sized boxes and provides three included TetherTube rod holders.
The 13 by 16 model provides more width while maintaining a manageable footprint. It supports 3700 sized tackle boxes and includes four TetherTube rod holders for broader fishing setups.
The 16 by 16 model provides the largest storage area and includes six TetherTube rod holders. It can hold seven 3700 sized tackle boxes while leaving additional space above them.
However, more storage can encourage unnecessary loading. Select the smallest model that comfortably carries your normal tackle because excess weight can affect kayak handling.
Assemble the BlackPak Pro Correctly
The BlackPak Pro uses interlocking GridLoc panels that fit together through tongue and groove joints. Start on a stable surface where you can keep every panel aligned during assembly.
Press the panels together before installing the screws. Then use a handheld Phillips screwdriver to install the included hardware without forcing the threads or rushing the alignment.
Check Every Joint Before Tightening
Inspect each corner after connecting the panels. The edges should sit flush, while the screw holes should line up naturally without excessive pressure.
Next, install the bottom, handle, rubber feet, corner brackets, and remaining hardware according to the assembly instructions. Tighten each fastener securely, but avoid excessive force that could damage plastic components.
Finally, operate the lid several times before loading tackle. Confirm that the hinges move correctly and the CatchLatch engages without resistance.
Set Up the Hinged Lid for Fast Access
The hinged lid gives the crate a major advantage over a basic open milk crate. You can access tackle while keeping the lid attached and close the storage area when moving across the water.
Adjust the hinge tension based on how you fish. A freely moving lid works well when you want quick opening, while a firmer setting can keep the lid positioned during tackle changes.
Before launching, close the lid and verify the CatchLatch. A properly closed lid helps keep loose items contained when the kayak moves through chop or during transport.
Keep the Lid Area Clear
A crowded top surface can make the crate harder to use. Therefore, keep the lid free from permanent clutter unless you have a specific reason to mount equipment there.
Store rarely used items inside the crate instead. Keep tools that you reach for repeatedly near the outside panels or within immediate arm’s reach.
Position the TetherTube Rod Holders
The TetherTube holders let you customize rod storage around your fishing technique. Their GridLoc mounting points allow different vertical positions on the crate panels.
Start with two holders behind your dominant casting position. Then position additional holders where they remain accessible without interfering with your paddle stroke or fishing line.
Use High and Low Positions Strategically
Mount holders higher when long rod butts need additional clearance. This arrangement can also keep reel handles away from the crate body during transport.
Mount holders lower when you want to raise the crate into a HighNDry style position. This setup can improve clearance around the kayak tankwell when your hull design requires it.
After mounting each holder, place an actual rod inside it. Check the rod angle, reel clearance, paddle movement, and casting path before finalizing your layout.
Use the Built In Rod Tethers
The integrated hooks and tethers add another layer of rod security. Attach the tether where it remains easy to release but cannot accidentally catch your line.
Test every tether before fishing. A holder should keep the rod secure during normal kayak movement without making quick rod changes unnecessarily difficult.
Organize Tackle Around Fishing Frequency
Good crate organization depends more on access frequency than maximum storage capacity. Place the tackle you use throughout the day where you can reach it quickly.
For example, keep terminal tackle, soft plastics, and frequently used hard baits in accessible boxes. Store seasonal or backup equipment deeper inside the crate.
Create a Simple Three Zone Layout
- Front zone: Store frequently used tackle and tools.
- Middle zone: Keep your primary lure and terminal tackle boxes.
- Rear zone: Store backup tackle and less frequently used equipment.
This layout reduces unnecessary searching during active fishing. More importantly, it gives every item a predictable location after you return it to the crate.
Use Compatible Tackle Boxes
Match your tackle boxes to the crate size instead of filling empty space with loose equipment. The BlackPak Pro supports common tackle formats, including several 3600 and 3700 sized systems.
Standardized boxes also make future preparation easier. You can remove an entire box for a specific trip instead of rebuilding your tackle collection every time.
Secure the Crate Inside Your Kayak
Never assume the crate will stay in place simply because it sits inside the tankwell. Use the available corner attachment points and appropriate retention hardware for your kayak.
The Omni corner brackets support several retention methods, including OmniHooks, carabiners, generic hooks, and bungee systems. Choose a setup that matches your kayak’s existing attachment points.
Test Security Before Launch
After securing the crate, pull it gently in several directions. It should remain stable without excessive movement against the tankwell.
Then simulate normal kayak movement before adding your full tackle load. A secure empty crate can behave differently after you add several heavy tackle boxes and accessories.
For rough water, inspect every connection before launching. A secondary safety connection can provide additional protection when your fishing conditions create greater movement.
Build a Practical Kayak Fishing Loadout
A well organized crate should support your fishing plan rather than carry every item you own. Start by deciding which species, techniques, and water conditions you expect during the trip.
Next, remove tackle that does not support that plan. This simple step reduces weight and makes the remaining equipment easier to find.
Keep Essential Tools Accessible
- Fishing pliers for hooks and split rings.
- Line cutters for quick tackle changes.
- Measuring tools when your fishing rules require them.
- Small repair items for basic kayak or tackle problems.
- Backup terminal tackle for common failures.
- Personal safety equipment suited to your trip.
Keep these items accessible without placing them where fishing line can constantly catch them. A small amount of planning can prevent repeated interruptions during active fishing.
Use the GridLoc Panels for Customization
The GridLoc 2D mounting system turns the crate into more than a tackle container. You can use its mounting points to position compatible accessories around the exterior and interior panels.
Start with only the accessories you genuinely need. Adding equipment simply because mounting space exists can make the crate heavier and harder to manage.
Mount Accessories Around Your Workflow
Place tools near the side you naturally reach during fishing. Position accessories away from areas where your paddle, fishing line, or rod handles frequently move.
For example, an angler who changes lures often may prioritize tool access. Another angler may benefit more from additional rod storage or dedicated tackle organization.
Therefore, build the crate around your movements instead of copying another angler’s exact configuration.
Protect Gear From Water and Corrosion
The BlackPak Pro uses a water shedding lid, but anglers should not treat it as a fully waterproof container. Water can still enter through openings, hardware areas, or repeated exposure during rough conditions.
Keep corrosion sensitive tackle inside suitable tackle boxes. For saltwater trips, rinse the crate and accessories with fresh water after fishing and allow everything to dry before storage.
Clean the Crate After Each Trip
First, remove all tackle boxes and loose equipment. Then rinse away salt, sand, dirt, and bait residue from the crate and mounting hardware.
Next, inspect the hinges, latch, tethers, screws, and corner attachments. Dry the crate thoroughly before closing the lid for long term storage.
Common BlackPak Pro Setup Mistakes
Many setup problems come from adding accessories before establishing a basic storage plan. Start with the crate, tackle boxes, and essential rod holders before adding optional equipment.
Overloading the Crate
More tackle does not automatically improve your fishing day. Excess weight can make transportation harder and can influence how your kayak sits on the water.
Instead, carry a focused selection based on the day’s conditions. Keep reserve tackle in a separate transport container when you need more options at the launch area.
Ignoring Tankwell Clearance
Another common mistake involves measuring only the crate body. Remember that rod holders and accessories extend beyond the main dimensions.
Measure the tankwell with the intended holder positions before final installation. This prevents interference with kayak controls, handles, straps, and other equipment.
Copying Someone Else’s Rig
A popular configuration may not match your kayak or fishing style. Your casting hand, paddle position, rod lengths, and target species all influence the best layout.
Therefore, treat other rigs as ideas rather than fixed templates. Test your arrangement on dry land before taking it onto the water.
A Simple Pre Launch Checklist
Use a short inspection routine before every trip. This routine takes little time and can prevent avoidable equipment problems.
- Confirm the lid closes and the CatchLatch engages.
- Check every rod holder and tether.
- Inspect the crate’s attachment points.
- Confirm tackle boxes sit securely inside.
- Remove loose objects that can move during paddling.
- Check that accessories do not block paddle movement.
- Verify that the crate sits correctly in the tankwell.
After launching, pay attention to how the kayak handles with the loaded crate. If the stern feels unusually heavy, reduce unnecessary equipment before continuing.
How to Make the Crate Faster to Use
Efficiency comes from reducing decisions during fishing. Label tackle boxes by technique, lure type, or target species so you can identify them immediately.
Also return every tool to the same location after use. Consistent placement prevents the common problem of searching through several boxes for one small item.
Before each trip, prepare the crate at home rather than at the launch. You can then spend less time organizing gear and more time setting up your kayak for the water.
When to Reconfigure Your BlackPak Pro
Your first layout does not need to become permanent. Reconfigure the crate when your fishing style, target species, kayak, or tackle selection changes.
For instance, seasonal fishing may require different tackle boxes and rod positions. Likewise, adding electronics or another accessory can create new clearance requirements.
Review the setup after several trips and note what you actually used. Then remove unused equipment and reposition frequently used items closer to your natural reach.
Frequently Asked Questions
How do I assemble a BlackPak Pro?
Connect the interlocking panels, install the included stainless steel screws, and attach the lid, feet, brackets, handle, and rod holders.
How many rods can the BlackPak Pro hold?
The included TetherTube count depends on the model, with three, four, or six holders across the available sizes.
Can I use Plano tackle boxes inside it?
Yes, the BlackPak Pro accommodates several common Plano formats, including 3600 and 3700 sized tackle boxes depending on model size.
How do I stop the crate from moving?
Use the corner attachment points with suitable OmniHooks, hooks, carabiners, or bungee retention matched to your kayak.
Is the BlackPak Pro waterproof?
The lid sheds water and helps protect stored gear, but you should use suitable waterproof containers for water sensitive equipment.
Final Thoughts
The BlackPak Pro becomes most useful when you treat it as a fishing system rather than a simple storage box. Start with the correct size, create a focused tackle layout, position rod holders around your movements, and secure the crate properly.
Then refine the setup after several fishing trips. Use the checklist before launching, remove equipment you rarely use, and keep essential tools within easy reach.
If you already own a BlackPak Pro, spend one trip testing your current arrangement instead of adding more accessories. A cleaner layout can improve access, reduce clutter, and help you spend more time fishing.