Nina Taylor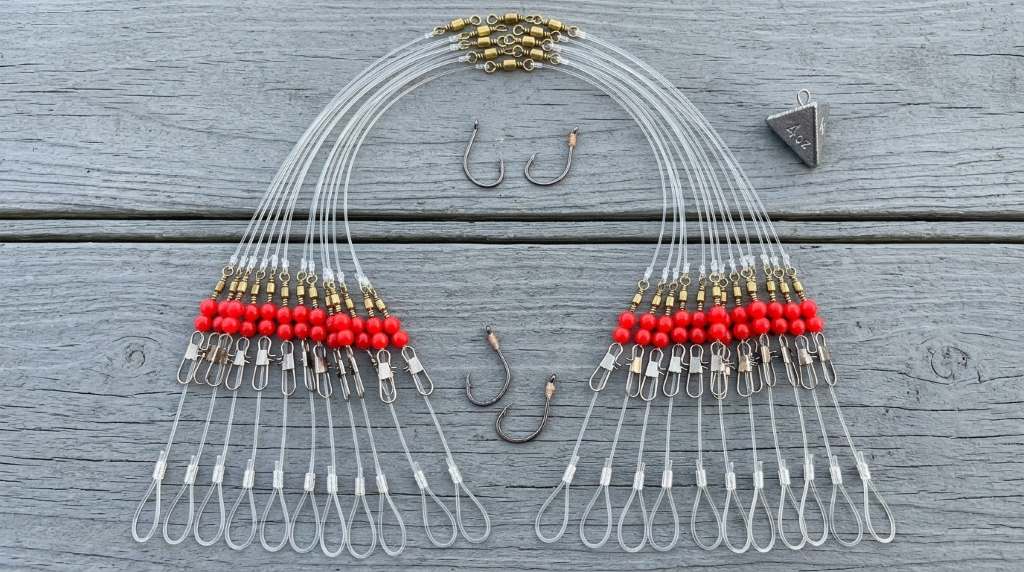
To rig Yoto Saltwater Fishing Leaders, connect your main line to a swivel, attach the leader, then secure the correct hook. Start with a 12 to 24 inch leader for general bottom fishing, then adjust length for current, structure, and bait movement. For anglers learning Yoto Saltwater Fishing Leaders, the key lies in matching leader strength, hook style, knot choice, and sinker setup. A properly built leader can handle abrasion while keeping bait moving naturally. Most practical saltwater setups use one main connection, one leader section, and one terminal hook, which keeps the rig simple and easy to inspect.
Key Takeaways
- Start with a 12 to 24 inch leader for many general saltwater bait setups.
- Match leader strength to fish size, structure, bait, and abrasion risk.
- Use a strong swivel when your rig needs separation between main line and leader.
- Choose a sliding sinker when you want bait to move naturally with less resistance.
- Inspect every knot, hook point, swivel, and leader section before fishing.
- Change leader length when current, water clarity, or bait movement changes.
Understand What the Leader Does
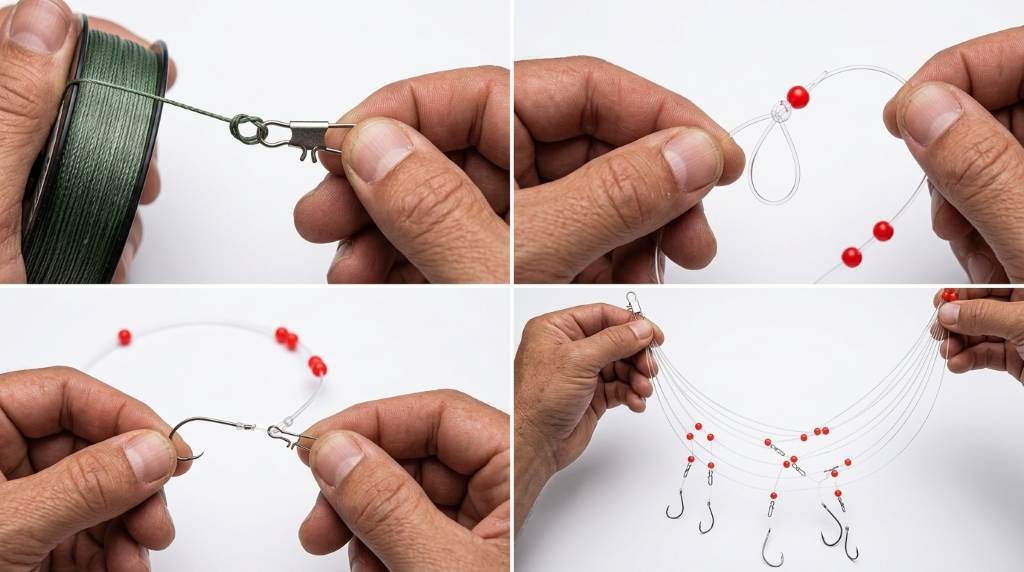
A leader creates a durable connection between your main line and terminal tackle. It also places the hook farther away from the main line, which can improve bait presentation. Additionally, the leader takes much of the abrasion caused by rocks, shells, structure, fish mouths, and other underwater hazards.
Fluorocarbon and monofilament both work for saltwater leaders, but each material behaves differently. Fluorocarbon offers low underwater visibility and strong abrasion resistance, while monofilament provides more stretch and often costs less.
Match Leader Strength to Conditions
Do not select leader strength from fish size alone. Instead, consider the structure, current, bait size, hook size, casting force, and likely abrasion.
- Light leader: Clear water, cautious fish, and open bottom.
- Medium leader: General inshore and bottom fishing.
- Heavy leader: Rocks, wrecks, heavy cover, large bait, and powerful fish.
A stronger leader can protect against abrasion, but excessive thickness can reduce bait movement. Therefore, use the lightest practical leader that still gives you enough protection for the fishing environment.
Gather the Right Rigging Components
Before tying anything, place every component beside your work area. This simple step prevents rushed knots and helps you build a consistent rig.
- Main fishing line
- Leader material
- Saltwater rated swivel
- Appropriate hook
- Sinker or sinker slide when needed
- Plastic bead for sliding sinker setups
- Line cutters
- Fishing pliers
Choose components that work together instead of buying each part independently. For example, a small hook paired with an extremely thick leader can create poor bait presentation and unnecessary stiffness.
Build the Basic Saltwater Leader Rig
The simplest setup uses a main line, swivel, leader, and hook. This configuration works well when you want a clean connection and easy leader replacement.
Step 1: Cut the Leader
Start by cutting 12 to 24 inches of leader material for a general purpose setup. Increase the length when you want the bait farther from the sinker or main connection.
However, avoid making the leader unnecessarily long in heavy current. A long leader can swing around the main line, wrap around structure, or create unwanted tangles.
Step 2: Connect the Main Line
Attach the main line to one eye of a suitable swivel. Use a knot that you can tie consistently and tighten correctly under fishing conditions.
A Palomar knot provides a simple option for many compatible line and terminal tackle combinations. Alternatively, many anglers use an Improved Clinch Knot when they prefer its familiar tying process.
Step 3: Attach the Leader
Connect the leader to the opposite eye of the swivel. Pull the connection steadily rather than jerking it tight, especially with fluorocarbon.
After tightening, inspect the knot for crossed wraps or damaged material. Then trim the tag end cleanly while leaving enough material to prevent accidental slippage.
Step 4: Tie on the Hook
Attach the hook to the free end of the leader using a suitable terminal knot. For many bait fishing applications, a Snell Knot can keep the hook and leader aligned effectively.
Check the hook orientation before cutting the tag end. The hook point should remain exposed enough to work properly with your selected bait.
Use a Sliding Sinker for Bottom Fishing
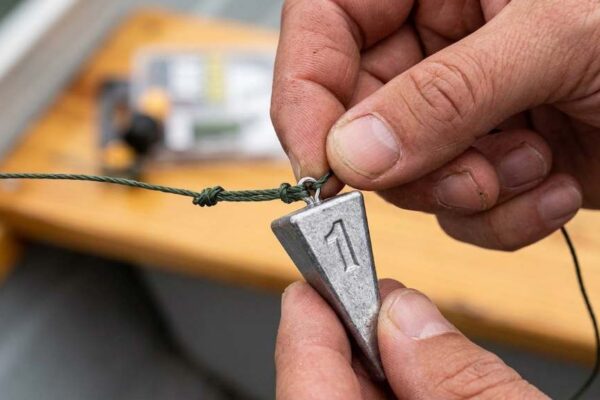
A sliding sinker setup works well when you want your bait near the bottom while allowing the fish to move with less immediate weight resistance. The basic arrangement places the sinker on the main line, followed by a bead and swivel.
- Thread the main line through the sinker.
- Add a protective bead after the sinker.
- Tie the main line to the swivel.
- Attach the leader to the opposite swivel eye.
- Tie the hook to the leader end.
The bead helps protect the swivel connection from repeated contact with the moving sinker. Meanwhile, the leader gives your bait room to move behind the weight.
Adjust Leader Length for Fishing Conditions
Leader length strongly affects how your bait behaves underwater. A shorter leader keeps the bait closer to the sinker, while a longer leader allows more movement.
| Fishing Condition | Starting Leader Length | Reason |
|---|---|---|
| Calm water | 18 to 24 inches | Allows natural bait movement |
| Moderate current | 12 to 18 inches | Reduces tangling |
| Heavy structure | 12 to 18 inches | Keeps bait closer to the rig |
| Clear water | 24 to 36 inches | Creates more separation from terminal tackle |
| Strong current | 12 to 24 inches | Improves control and reduces swing |
These lengths provide useful starting points rather than rigid rules. Change the leader when your bait stops moving naturally or begins wrapping around the rig.
Choose Between Fluorocarbon and Monofilament
Fluorocarbon works particularly well when fish see the line easily or when the bottom contains abrasive cover. Its stiffness can also help reduce some leader tangling during certain bait presentations.
Monofilament remains useful when you want more stretch and easier handling. Its flexibility can help live bait move naturally, while its larger diameter can provide useful abrasion protection.
When Fluorocarbon Makes Sense
- Clear water
- Rocky structure
- Sharp shells
- Cautious fish
- Situations requiring low visibility
When Monofilament Makes Sense
- General bait fishing
- Live bait presentations
- Budget focused rig building
- Situations where additional stretch helps
- Long leader applications requiring flexibility
Match the Hook to the Bait
Your leader cannot compensate for an unsuitable hook. Match hook size to the bait and target fish while keeping the hook point clear.
Circle hooks suit many bait fishing applications because they can promote corner hookups when anglers allow the fish to load the line properly. J hooks can suit other techniques, but their use depends on the target species and applicable fishing regulations.
Before casting, inspect the hook point with your fingertip carefully. Replace or sharpen a damaged hook because a dull point can waste an otherwise well prepared rig.
Build a Two Hook Leader Setup
A two hook setup can help when fish feed at different heights above the bottom. However, adding another hook also increases the chance of tangles.
Start with a leader section long enough to separate the hook positions. Tie dropper loops at different heights, then connect the hooks while keeping each branch short enough to stay clear.
- Keep the hook branches separated.
- Use similar leader strength throughout the rig.
- Keep the sinker below the hook branches.
- Test the rig by stretching it before fishing.
If the branches repeatedly wrap around the main leader, shorten them or increase their spacing. A simpler one hook rig often performs better when current creates excessive movement.
Use a Three Way Swivel Around Structure
A three way swivel provides another useful configuration for bottom fishing. One connection joins the main line, another carries the hook leader, and the third carries the sinker connection.
This arrangement separates the bait from the weight and can make the bait ride above the bottom. You can also use lighter material for the sinker dropper, which may reduce losses when the weight becomes stuck.
Rig Live Bait Without Killing Its Action
Live bait needs freedom to move, so avoid oversized hooks and unnecessarily stiff leaders. Place the hook where the bait remains lively while keeping the hook point ready for a solid connection.
When using baitfish, consider nose hooking, back hooking, or bridling based on the bait and presentation. Test the bait beside the boat or shoreline first, because its swimming action quickly reveals whether the rig works.
Prevent Common Leader Failures
Many leader failures start before the first cast. A small nick, poorly seated knot, damaged swivel, or dull hook can turn a strong setup into a weak connection.
Check for Abrasion
Run your fingers along the leader before every fishing session. Replace any section that feels rough, flattened, cloudy, or visibly damaged.
Check Every Knot
Look for crossed wraps, loose coils, burned line, or poorly trimmed tag ends. Then pull each connection firmly before attaching bait.
Check the Swivel
Make sure the swivel rotates freely and shows no cracks or corrosion. Saltwater can quickly expose weak hardware, especially when you repeatedly reuse old terminal tackle.
Check the Hook
Inspect the point, eye, and shank before every trip. Replace hooks that show corrosion, bending, or obvious damage.
Fix Tangling Before Changing Everything
If your leader keeps tangling, first shorten the leader rather than immediately changing the entire rig. Next, check whether the sinker creates too much movement for the current.
Also inspect your casting technique and bait placement. A poorly balanced bait can spin underwater and transfer that rotation directly into the leader.
Improve Your Rig With Small Adjustments
Successful leader rigging rarely requires complicated hardware. Instead, small changes to length, material, hook position, and sinker weight can produce noticeable improvements.
- Shorten the leader when tangles increase.
- Lengthen the leader when bait needs more freedom.
- Increase leader strength around sharp structure.
- Reduce leader diameter when visibility becomes a concern.
- Change sinker weight when current prevents proper bottom contact.
- Replace damaged terminal tackle instead of forcing another trip from it.
Make one adjustment at a time whenever possible. That approach helps you understand exactly which change improved your bait presentation.
Prepare Leaders Before the Fishing Trip
Pre rigging several leaders can save valuable time when fish become active. Prepare different lengths and strengths so you can respond quickly when conditions change.
Store finished leaders separately to prevent hooks from catching other line sections. Small leader wallets, tackle boxes, or labeled bags can keep each setup organized.
A Simple Rigging Checklist
Before dropping your rig into the water, run through the same inspection routine every time. Consistency prevents small mistakes from becoming lost fish.
- Confirm the leader length.
- Check leader material for damage.
- Test the main line connection.
- Inspect the swivel.
- Check every knot.
- Confirm hook sharpness.
- Check sinker position.
- Make sure bait sits naturally.
Once the rig passes this checklist, attach the bait and test its movement. If the bait spins, hangs unnaturally, or tangles, correct the problem before casting.
FAQ
What leader length works for general saltwater fishing?
A 12 to 24 inch leader provides a practical starting range for many general bait fishing situations.
Should I use fluorocarbon or monofilament leader?
Use fluorocarbon for low visibility and abrasion resistance, while monofilament offers flexibility and useful stretch.
Do I need a swivel for a saltwater leader?
No, but a swivel provides a convenient connection point and can help manage line twist in suitable rigs.
How do I stop my saltwater leader from tangling?
Shorten the leader, reduce excessive bait rotation, improve hook placement, and match sinker weight to the current.
How often should I replace a saltwater leader?
Replace the leader whenever you find abrasion, cuts, weakened knots, discoloration, or other visible damage.
Final Rigging Advice
The best saltwater leader setup starts with a simple connection that matches the fishing conditions. Build around the target fish, bait, structure, current, and required casting distance instead of following one fixed configuration.
Start with a clean swivel connection, a properly sized leader, and a sharp hook. Then test the rig before fishing and make small adjustments when the bait fails to move naturally. Use this process consistently, and you will spend less time repairing tackle and more time presenting bait effectively.
Prepare two or three leader variations before your next trip, then test each setup under the conditions you expect to fish.