Nina Taylor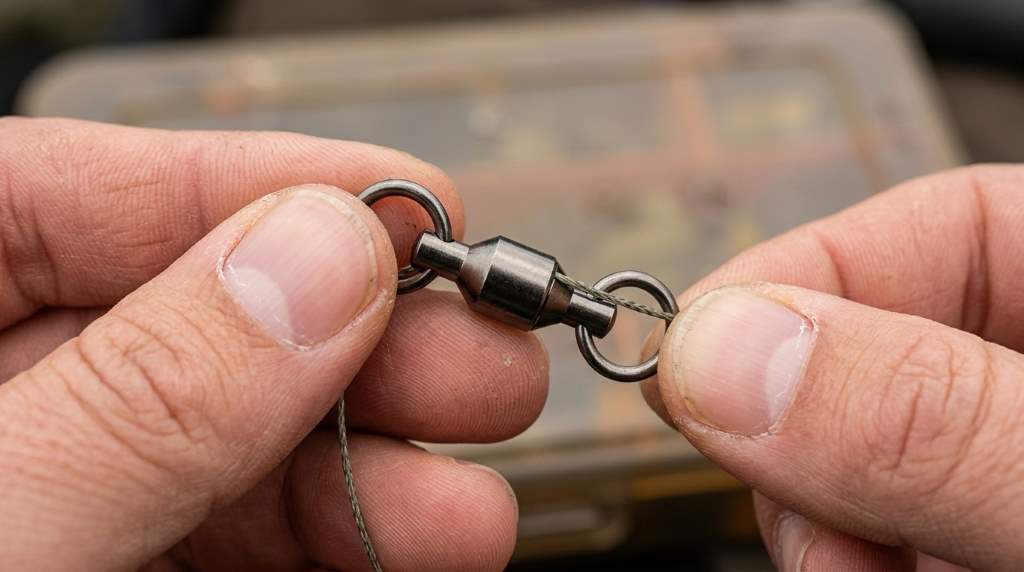
Dr. Fish Ball Bearing Snap Swivels connect your main line or leader to lures while allowing smooth rotation. To use them, tie your line securely to the swivel ring, then attach your lure through the snap. The current Dr. Fish range includes models from 17 to 79 pounds, with 30 pieces in the listed pack.
For anglers learning terminal tackle, Dr. Fish Ball Bearing Snap Swivels offer a practical combination of quick lure changes and rotation. However, proper sizing and secure closure matter more than simply attaching one. A correctly matched swivel can reduce line twist without adding unnecessary hardware.
Key Takeaways
- Tie your main line or leader to the swivel’s fixed ring.
- Attach your lure to the snap, not the bearing body.
- Match swivel strength with your leader and fishing conditions.
- Check the snap closure before every cast or trolling run.
- Use ball bearing swivels when lure rotation creates line twist.
- Avoid bulky snaps when small lures need natural movement.
Understand What the Swivel Actually Does
A ball bearing snap swivel combines two useful functions in one terminal connection. The snap lets you change lures quickly, while the bearing mechanism allows the connection to rotate.
That rotation becomes useful when your lure, bait, or rig spins during movement. Therefore, the swivel can reduce twisting forces that would otherwise travel directly into your fishing line.
Snap Versus Swivel Function
The snap handles attachment, while the swivel handles rotation between connected sections. Keeping these functions clear makes the rigging process much easier.
Unlike a simple swivel, this design lets you remove a lure without cutting your line. Consequently, anglers can test different lures without repeatedly tying new connections.
Choose the Correct Dr. Fish Size
Start with the swivel’s breaking strength rather than its physical size alone. Manufacturers often use different numbering systems, so pound ratings provide a better comparison.
Your swivel should not become the weakest connection in your setup. Instead, match its strength to your leader, lure load, target species, and fishing conditions.
| Fishing Situation | Practical Strength Range | Main Consideration |
|---|---|---|
| Light freshwater | 17 to 30 lb | Keep the hardware compact |
| General lure fishing | 30 to 50 lb | Balance strength and lure movement |
| Heavier inshore use | 50 to 79 lb | Allow extra strength for hard runs |
| Heavy trolling | Use a higher rated model | Account for sustained pulling force |
These ranges provide practical starting points rather than universal rules. Always check the specific swivel rating and compare it with your complete terminal setup.
Prepare Your Line Before Attachment
Before tying anything, inspect the final section of your fishing line. Remove damaged, frayed, flattened, or badly abraded material before making the connection.
Next, cut the line cleanly with sharp cutters or scissors. A clean tag end passes through small swivel eyes more easily and produces cleaner knots.
Leave Enough Tag End
Do not trim your tag end immediately after tying the knot. Leave enough material to inspect the finished connection under tension.
Additionally, a slightly longer tag end gives you room to retie after testing. You can trim excess material once the knot performs correctly.
How to Tie the Swivel to Your Line
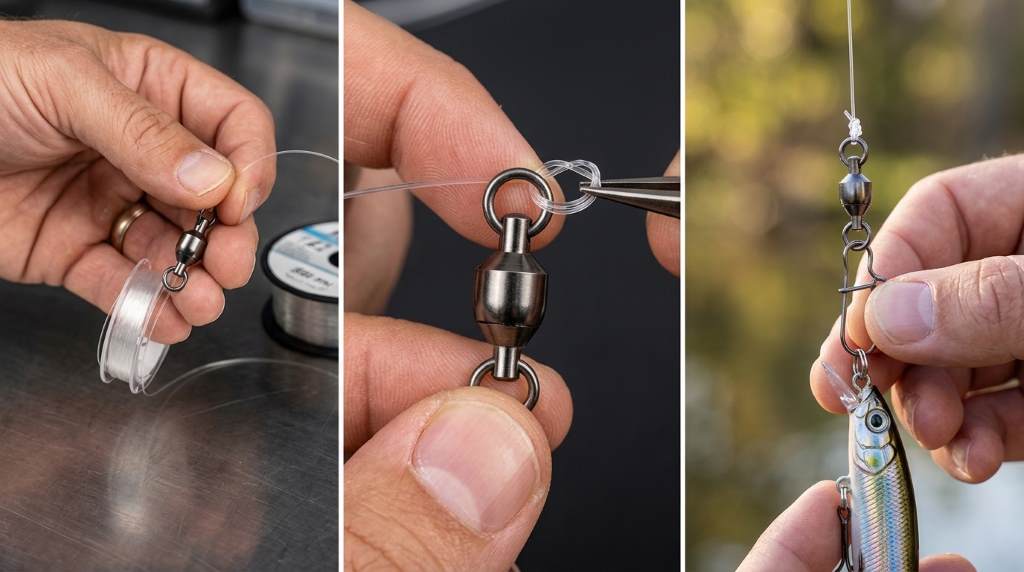
Run your main line or leader through the fixed swivel eye. Then form your preferred terminal knot while maintaining steady tension throughout the process.
For many anglers, an improved clinch knot works well with suitable line sizes. A Palomar knot also provides a strong option when the swivel eye accommodates doubled line.
- Pass the line through the swivel eye.
- Create the required loops for your selected knot.
- Wet the line before tightening the knot.
- Pull the standing line steadily to seat the knot.
- Inspect the coils for overlapping or crossed sections.
- Trim the tag end after testing the connection.
Do not pull a dry knot aggressively because friction can generate unwanted heat. Instead, lubricate the knot lightly before applying controlled pressure.
Attach Your Lure to the Snap
Open the snap by moving its wire through the designated opening. Then slide the lure’s attachment eye fully into the closed section.
Afterward, release the snap and confirm that its wire returns completely into position. Never assume the snap closed simply because the lure stayed attached during handling.
Check the Connection Before Casting
Hold the lure and swivel separately, then apply moderate hand pressure to the connection. Look for incomplete closure, bent wire, unusual gaps, or restricted movement.
If anything looks questionable, replace the swivel before fishing. A small hardware problem can become a lost lure during a hard strike.
Position the Swivel Correctly
The swivel should sit between your line connection and the lure or terminal component. This arrangement lets the bearing section rotate while the snap provides quick attachment.
However, avoid adding unnecessary swivels throughout the same rig. Extra hardware can increase weight, alter movement, and create additional failure points.
Watch the Lure’s Attachment Eye
Some lures work better when the snap moves freely around their attachment eye. Others perform better with a direct connection or a small loop.
Therefore, observe the lure underwater before fishing seriously. If the snap restricts the intended action, change the connection method.
Use Ball Bearing Swivels When Rotation Matters
Ball bearing construction becomes especially useful when your lure or bait creates continuous rotational force. Trolling and spinning presentations can place repeated torque on the line.
During those situations, smoother rotation can help manage twisting more effectively. The benefit becomes less important when your lure produces little rotational movement.
Good Applications
- Trolling lures that rotate continuously
- Spinning spoons and similar moving lures
- Rigs that experience repeated line twist
- Fishing situations requiring frequent lure changes
- Presentations that place steady rotational pressure on the connection
Know When Not to Use One
A snap swivel does not automatically improve every fishing presentation. Small lures can lose natural movement when anglers attach bulky terminal hardware.
For finesse fishing, direct knots may provide a cleaner connection. Similarly, some specialized lures perform better with a specific loop or split ring.
Before adding a swivel, consider three factors: lure action, line twist, and connection convenience. If rotation creates no problem, the hardware may provide little practical benefit.
Use the Right Knot for Your Line
Monofilament and fluorocarbon generally accept several common terminal knots. Braided line may require a knot that handles its thinner diameter and reduced surface friction.
Regardless of line type, test the finished knot before fishing. A knot that looks perfect can still fail when poor tension or incorrect seating affects its structure.
| Line Type | Common Terminal Options | Important Check |
|---|---|---|
| Monofilament | Improved clinch, Palomar | Seat coils evenly |
| Fluorocarbon | Improved clinch, Palomar | Prevent damaged line |
| Braided line | Palomar or suitable braid knot | Check knot slippage |
Knot choice should also reflect your actual line diameter and fishing conditions. Always test unfamiliar combinations before relying on them with larger fish.
Inspect the Swivel Before Every Trip
Terminal tackle experiences repeated stress during casting, retrieving, landing, and lure changes. Consequently, routine inspection can prevent avoidable failures.
Look closely at the snap, swivel body, bearing area, and connecting eyes. Replace hardware showing corrosion, deformation, cracks, excessive wear, or a weakened closure.
Pay Attention to Saltwater Exposure
Saltwater can accelerate corrosion on fishing hardware when anglers neglect cleaning. Rinse exposed swivels with fresh water after saltwater sessions.
Then allow the hardware to dry completely before storing it. Avoid storing wet terminal tackle inside a sealed container for extended periods.
Test the Snap Under Controlled Pressure
Before fishing, gently load the connection by pulling the line and lure in opposite directions. The snap should remain closed without visibly spreading or deforming.
Do not apply extreme force with your hands to simulate a fish. Instead, use controlled pressure and replace questionable hardware rather than testing its breaking point.
Common Mistakes Anglers Make
- Using a swivel that matches neither the line nor leader strength
- Attaching the lure before checking snap closure
- Using oversized hardware with lightweight lures
- Ignoring corrosion after repeated saltwater use
- Leaving damaged line near the swivel connection
- Assuming ball bearings eliminate every type of line twist
- Using snap swivels when direct attachment improves lure action
These mistakes usually come from treating terminal tackle as an afterthought. Instead, consider the swivel part of the complete fishing system.
How to Change Lures Quickly
Open the snap and remove the current lure without disturbing your main line. Then inspect the snap before attaching the replacement lure.
Attach the new lure and close the snap completely. Finally, check the lure’s movement before making a full cast.
This method saves time when conditions change throughout the day. It also reduces repeated knot tying, which can become inconvenient during active fishing.
How to Store Dr. Fish Snap Swivels
Keep unused swivels dry and separated from wet tackle whenever possible. A small tackle compartment can prevent hardware from mixing with hooks and other sharp components.
After saltwater use, rinse reusable swivels and dry them thoroughly. Then inspect them again before returning them to long term storage.
Replace Rather Than Risk Failure
Terminal hardware costs little compared with losing a valuable lure or fighting fish. Therefore, replace questionable swivels instead of relying on damaged components.
This approach becomes especially important during heavy fishing. High loads can expose weaknesses that casual handling never reveals.
A Simple Setup Checklist
- Confirm the swivel’s strength rating.
- Inspect your line for damage.
- Tie the line securely to the fixed eye.
- Seat and lubricate the knot properly.
- Attach the lure to the snap.
- Confirm complete snap closure.
- Check lure movement before casting.
- Inspect the connection again during long fishing sessions.
Following this sequence creates a repeatable setup routine. More importantly, it helps catch small connection problems before they cost you tackle.
Frequently Asked Questions
How do you attach a lure to a Dr. Fish snap swivel?
Open the snap, place the lure’s attachment eye inside it, and confirm the snap closes completely.
Can you use Dr. Fish ball bearing swivels with braided line?
Yes, you can connect braided line when your chosen knot securely handles the braid.
Do ball bearing snap swivels prevent line twist?
They can reduce rotational line twist by allowing smoother movement between connected components.
What size Dr. Fish swivel should you use?
Match the swivel’s rated strength to your leader, lure load, target fish, and fishing conditions.
Should you use a snap swivel with every lure?
No, direct connections can work better when bulky hardware affects lure action or presentation.
Final Thoughts
Using a Dr. Fish ball bearing snap swivel correctly requires more than clipping on a lure. Choose suitable strength, tie a secure knot, close the snap fully, and inspect the connection regularly.
Start with a setup that matches your line and lure rather than simply using the largest available swivel. Then test the connection before fishing and replace any hardware showing damage.
Use these steps on your next fishing trip to build faster, cleaner, and more reliable terminal connections. A few seconds of inspection can protect your lure, line, and hard earned catch.