Nina Taylor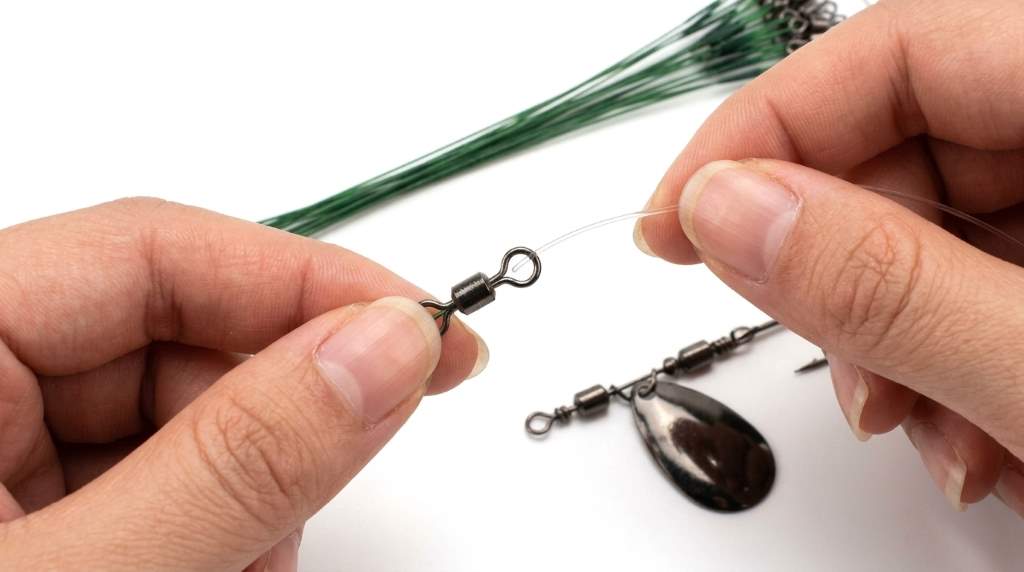
Rigging Scotank Fishing Leaders correctly starts with matching leader strength, hook size, and terminal tackle. Build each connection carefully, then test every knot before casting. For context, Scotank Fishing Leaders can suit anglers who want a dependable leader setup for different fishing conditions. A properly rigged leader reduces weak connections and helps maintain natural bait movement. In practice, anglers often spend more time checking knots than replacing damaged leaders. Therefore, learning a repeatable rigging process helps you prepare faster and fish with greater confidence.
Key Takeaways:
- Match leader strength to the target species and fishing environment.
- Inspect the leader for abrasion, cuts, kinks, and damaged knots.
- Use a reliable knot that matches your line and terminal tackle.
- Keep the leader length appropriate for water clarity and structure.
- Test every connection before making a full cast.
- Replace damaged leaders instead of trusting questionable connections.
Understand the Leader Before Rigging
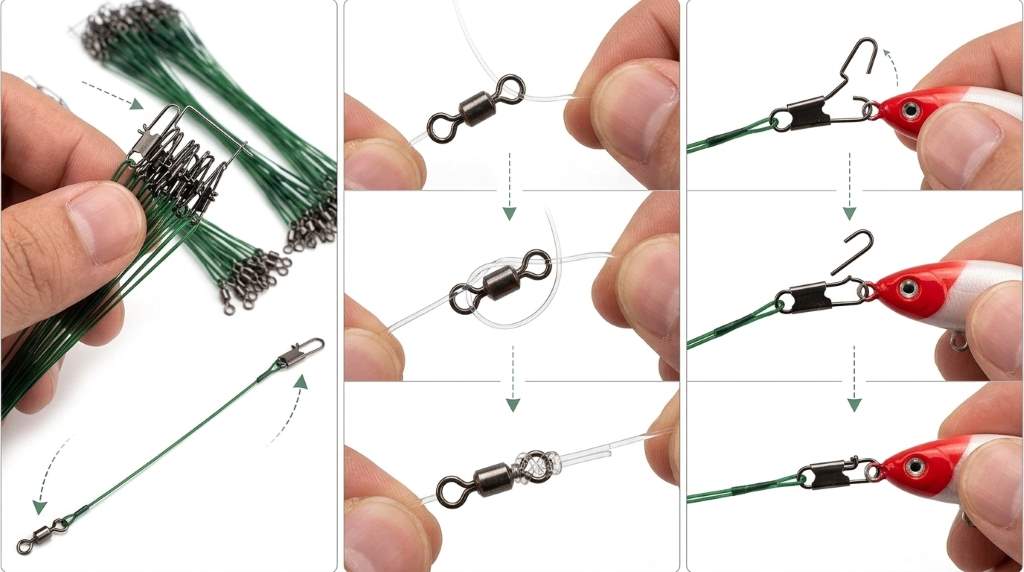
A fishing leader creates the final connection between your main line and terminal tackle. It can protect against abrasion while also controlling bait presentation and lure movement. Therefore, understand its construction before attaching hooks, swivels, or lures.
First, check the leader’s material, breaking strength, diameter, and overall condition. Next, examine both ends for factory connections, loops, sleeves, or other attachment points. These details determine which rigging method makes the most sense.
Check Leader Strength
Leader strength should match the fish, cover, lure, and main line. Using extremely light leader material can create unnecessary breakoffs around rocks, vegetation, docks, or submerged timber.
However, excessively heavy leader material can affect bait movement and presentation. Consequently, select the lightest practical leader that provides enough abrasion resistance for your conditions.
Inspect the Leader Carefully
Before rigging, run the leader between your fingers and inspect the entire length. Look for rough spots, flattened sections, cuts, discoloration, or unwanted memory.
If you find significant damage, replace the leader immediately. A small damaged section can become the weakest point during a hard fight.
Prepare the Main Line and Terminal Tackle
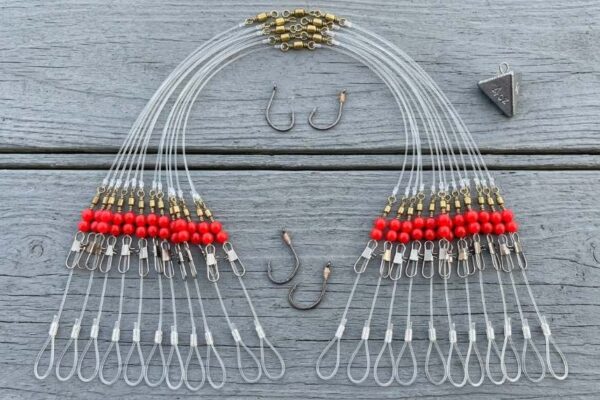
Successful rigging starts before you tie the first knot. Lay out the main line, leader, hook or lure, swivels, cutters, and any sleeves you plan to use.
Additionally, keep your work area organized so the leader does not pick up dirt or become tangled. Good preparation reduces rushed knots and prevents avoidable mistakes.
Choose the Right Connection
Use a direct line to leader knot when you want a compact connection. Alternatively, use a swivel when you need rotation control or faster leader changes.
For leaders with a preformed loop, a loop connection can simplify rigging. Always follow the connection design rather than forcing an incompatible knot onto the leader.
Step by Step Scotank Leader Rigging
Start by cutting a clean section of leader material if you need a custom length. Make the cut with sharp line cutters to create a clean end for threading.
Next, connect the leader to your main line using a suitable knot. Keep each wrap organized and tighten the knot gradually instead of pulling aggressively from the beginning.
Step 1: Set the Leader Length
Measure the leader against your fishing setup before making the terminal connection. Shorter leaders can work well when you need simple handling and quick lure changes.
Longer leaders can provide additional abrasion protection around structure or wary fish. Nevertheless, avoid excessive length that creates casting problems or unnecessary tangles.
Step 2: Connect the Main Line
Thread the leader through the connection point and create the selected knot carefully. Keep the wraps neat, tight, and evenly spaced throughout the tying process.
Then moisten the knot before tightening when your chosen knot benefits from reduced friction. Pull the standing lines steadily until the knot seats completely.
Step 3: Attach the Terminal Tackle
Attach the hook, lure, or swivel using a suitable terminal knot. Leave enough tag end to prevent the knot from slipping during tightening.
Afterward, trim the tag end while leaving a small safety margin. Do not cut directly against the knot because minor movement can weaken the connection.
Step 4: Test Every Connection
Hold the main line firmly and apply steady pressure to the finished rig. Increase the pressure gradually rather than using a sudden jerk.
Check whether the knot slips, deforms, or creates visible damage. If anything looks questionable, cut it away and tie the connection again.
Match the Rig to Fishing Conditions
Different environments place different demands on a fishing leader. Clear water may require a less noticeable presentation, while heavy cover demands greater abrasion resistance.
Likewise, current, depth, bait size, and target species can influence your leader setup. Therefore, avoid treating one leader configuration as suitable for every situation.
| Fishing Condition | Rigging Focus | Reason |
|---|---|---|
| Clear water | Appropriate diameter | Maintains a natural presentation |
| Heavy cover | Higher abrasion resistance | Handles contact with structure |
| Strong current | Secure connections | Reduces stress on knots |
| Live bait | Flexible terminal setup | Supports natural bait movement |
| Artificial lures | Compact connection | Helps preserve lure action |
Common Rigging Mistakes to Avoid
Many leader failures come from simple preparation errors rather than defective tackle. Fortunately, most problems disappear when you slow down during knot tying.
- Using damaged leader: Replace sections with visible cuts, abrasions, or severe kinks.
- Choosing excessive leader strength: Match the material to the actual fishing conditions.
- Rushing the knot: Form each wrap neatly before applying final tension.
- Skipping the pull test: Test every finished connection before casting.
- Leaving excessive tag ends: Trim cleanly while preserving a small safety margin.
- Ignoring terminal movement: Check that the lure or hook moves as intended.
Improve Knot Reliability With Better Technique
Knot quality depends heavily on consistency. Even a strong knot can fail when you cross wraps, tighten unevenly, or damage the line through excessive friction.
Therefore, develop one dependable tying routine and repeat it every time. Practice at home until you can form clean connections without rushing on the water.
Keep Tension Controlled
Apply gradual pressure during final tightening to seat the knot properly. Sudden force can create unnecessary friction and damage sensitive leader materials.
Once the knot seats, inspect its shape from several angles. A properly formed knot should look compact rather than twisted or uneven.
Protect the Connection During Casting
Check whether your leader connection passes smoothly through the rod guides. Bulky knots can catch during casting and reduce distance or create sudden line tension.
If the connection repeatedly catches, consider a more compact knot or shorter leader. Always balance casting performance with the abrasion protection your fishing conditions require.
When to Replace a Scotank Leader
Leader replacement should follow condition rather than a fixed schedule. Frequent contact with structure, fish teeth, rocks, or abrasive surfaces can shorten useful life quickly.
After catching a strong fish, inspect the leader near the hook and along areas exposed to cover. Replace it when you notice roughness, whitening, cuts, flattened sections, or damaged knots.
Furthermore, replace the leader whenever a connection fails a reasonable pressure test. Fresh leader material costs less than losing a valuable lure or fish because of preventable damage.
A Practical Pre Cast Inspection
A short inspection can prevent many avoidable failures. Before casting, confirm that every connection remains tight and that the leader runs freely.
- Inspect the entire leader for visible damage.
- Check both knots for slippage or deformation.
- Confirm the hook or lure connection remains secure.
- Test the rig with steady hand pressure.
- Check that the terminal tackle moves freely.
- Trim problematic tag ends before casting.
This routine takes only a few moments when you practice it consistently. More importantly, it turns leader inspection into a normal part of your fishing preparation.
How Leader Setup Affects Bait and Lure Action
Leader diameter, stiffness, length, and terminal connections can influence how your bait or lure behaves. A bulky connection may restrict movement and create unnatural presentation.
On the other hand, a suitable leader can provide enough freedom for natural movement. Consequently, observe your rig in the water whenever possible before committing to a full fishing session.
When a Swivel Makes Sense
A swivel can simplify certain rigs and reduce line twist in situations where rotation becomes a problem. It can also make leader replacement faster during active fishing.
However, swivels add hardware and may affect lure presentation. Use one when its specific benefit outweighs the additional component in your rig.
Build a Repeatable Rigging Routine
Experienced anglers often rely on repeatable preparation rather than improvisation. Create a simple routine that covers leader inspection, knot tying, terminal attachment, and tension testing.
Then prepare spare leaders before leaving for the water. This approach lets you replace damaged tackle quickly without rushing through another connection.
Store Spare Leaders Properly
Keep unused leaders protected from unnecessary heat, sunlight, chemicals, and crushing pressure. Store prepared rigs so hooks and terminal hardware cannot damage the leader material.
Additionally, label different leader setups when you carry several strengths or lengths. Clear organization saves time when conditions change during a fishing trip.
Frequently Asked Questions
What knot should I use for a fishing leader?
Use a reliable knot that matches your main line, leader material, connection size, and fishing conditions.
How long should a fishing leader be?
Use a length that provides the needed abrasion protection without creating casting or presentation problems.
Should I use a swivel with a Scotank leader?
Use a swivel when it helps manage line twist or simplifies leader changes without harming your presentation.
How can I test a leader knot?
Apply steady hand pressure and inspect the knot for slipping, deformation, or visible leader damage.
When should I replace my fishing leader?
Replace the leader whenever abrasion, cuts, severe kinks, weakened knots, or other visible damage appears.
Final Rigging Checklist
Correct leader rigging comes down to suitable materials, clean knots, controlled tension, and careful inspection. When you match the setup to your conditions, you reduce preventable failures and improve overall tackle control.
Before your next fishing trip, practice the complete rigging process at home. Then inspect every connection before casting and replace questionable leaders immediately.
Prepare your Scotank leader rig today, test every connection, and make leader inspection part of your regular fishing routine.