Nina Taylor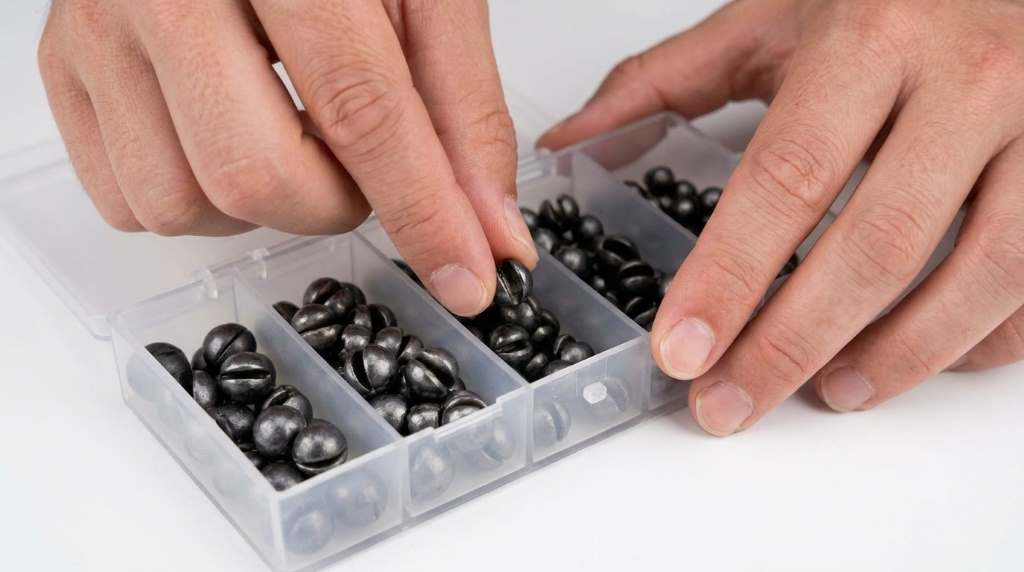
Use Sanweal split shot fishing weights to fine tune bait depth, casting control, and line sensitivity. These small weights clamp onto fishing line without requiring a full terminal tackle change. For beginners, Sanweal Split Shot Fishing Weights offer a simple way to adjust rigs quickly. Split shot typically works best when you add weight gradually and test the rig. In fact, even a small adjustment can change how naturally bait moves underwater. This guide explains placement, attachment, sizing, removal, and common mistakes. It also covers practical rig adjustments for changing water depth and current.
Key Takeaways
- Attach split shot firmly without crushing or damaging the fishing line.
- Start with minimal weight, then increase it gradually when necessary.
- Place weights based on bait depth, current, casting needs, and presentation.
- Use multiple small shots when you need finer control over sink rate.
- Inspect the line after removing or repositioning each weight.
- Match the weight setup with your target species and fishing technique.
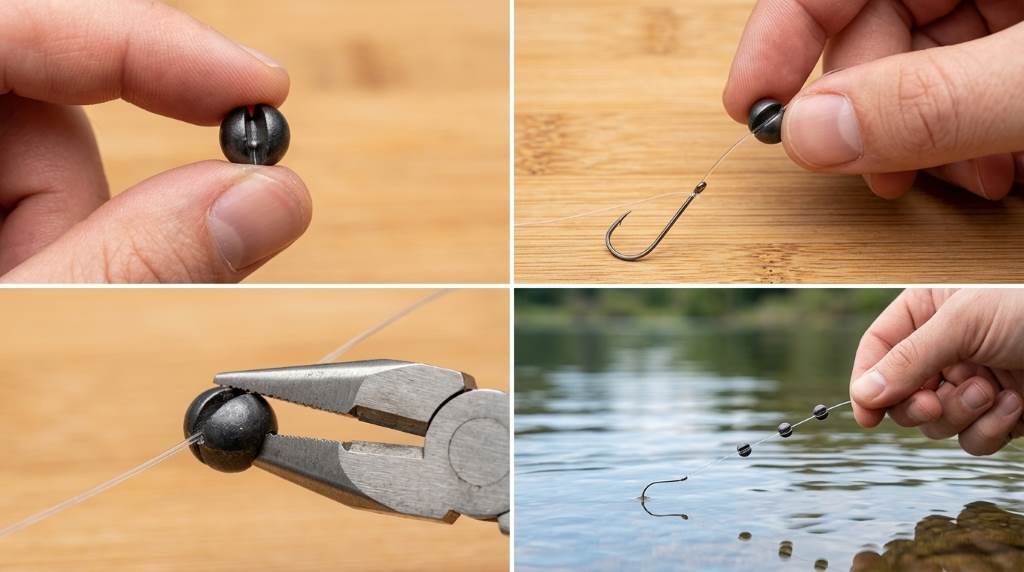
Understand What Split Shot Weights Actually Do
Split shot weights add compact weight directly to your fishing line. Unlike larger sinkers, they let anglers make small adjustments without rebuilding an entire rig.
Therefore, split shot works particularly well when conditions change during a fishing session. You can adjust sink rate, bait depth, and casting balance within seconds.
Why Weight Placement Matters
The position of a split shot changes how your bait travels through the water. A weight near the hook creates a faster, more direct descent.
Meanwhile, placing weight farther from the hook can create a slower and more natural bait presentation. That difference becomes important when fish respond cautiously to movement.
Choose the Right Split Shot Size
Sanweal split shot sets can contain different sizes for different fishing situations. Always check the individual weight markings and package specifications before rigging.
Start with the smallest practical shot when fishing shallow water or presenting lightweight bait. Then, add progressively larger or additional shots when conditions require more control.
| Fishing Situation | Starting Approach | Adjustment |
|---|---|---|
| Shallow water | Use minimal weight | Add weight slowly |
| Deep water | Use moderate weight | Increase until bait reaches depth |
| Strong current | Start with extra control | Add weight if bait drifts |
| Light bait | Use a small split shot | Increase gradually |
| Finesse presentation | Use one small shot | Spread multiple shots if needed |
Prepare Your Fishing Line
First, inspect your line before attaching any weight. Remove damaged sections because split shot can increase stress around the attachment point.
Next, decide where you want the weight before clamping it. Consider your hook position, leader length, bait type, and target depth.
Keep the Line Straight
Hold the line reasonably straight while attaching the shot. A straight section helps the weight grip consistently and reduces unnecessary movement.
However, avoid stretching the line aggressively during installation. Excessive tension can weaken some fishing lines before you even start fishing.
How to Attach Sanweal Split Shot Fishing Weights
Place the fishing line inside the split opening of the weight. Then, gently squeeze the weight around the line using your fingers or suitable split shot pliers.
Apply enough pressure to secure the shot without crushing the line. Afterward, pull the line gently to confirm that the weight stays in position.
Use the Correct Amount of Pressure
The goal involves secure attachment rather than maximum compression. Overly tight split shot can deform the line and create a weak point.
Therefore, use controlled pressure and inspect the line after clamping. If you see flattening, cuts, or visible damage, replace that section.
Position the Weight for Better Bait Control
Place the weight close to the hook when you need a faster descent. This setup also helps keep lightweight bait near the intended fishing depth.
Alternatively, move the weight farther from the hook when you want gentler bait movement. This arrangement can help maintain a more natural presentation.
Use Multiple Small Weights
Several small shots can provide better control than one heavy weight. You can space them along the line to create a gradual sinking effect.
For example, spread smaller shots along a leader when you want controlled descent. This approach also makes later adjustments easier during changing conditions.
Adjust Weight for Water Depth
Begin with enough weight to reach your target zone without dragging the bait unnecessarily. Then, watch how quickly the bait descends after each adjustment.
If the bait falls too quickly, remove one shot or move the weight farther away. Conversely, add weight when wind or current prevents the bait from reaching depth.
Use a Simple Depth Test
Drop the rig beside the boat, dock, or shoreline when visibility allows. Observe the descent and adjust the weight before making repeated casts.
This simple test saves time and helps prevent unnecessary changes after you start fishing. It also gives you a clearer sense of your rig’s behavior.
Match Split Shot Placement to Fishing Conditions
Calm water often requires less weight because the rig experiences less resistance. Start light, especially when fish show interest in slow presentations.
Wind and current can demand more weight for better control. Nevertheless, add weight gradually because excessive weight can make bait look unnatural.
Fishing in Current
Current can lift lightweight rigs away from your intended strike zone. Adding a small shot can counter that movement and improve depth control.
However, avoid turning the rig into a heavy anchor. Fish may detect unnatural resistance when they take the bait and move away.
Improve Casting Without Overloading the Rig
Split shot can add useful casting weight to lightweight presentations. Still, adding too much weight can change your rod’s loading and casting behavior.
Instead, increase weight in small steps while monitoring distance and accuracy. Stop when the rig casts comfortably and maintains the desired presentation.
Know When to Add or Remove Weight
Watch your line, bait movement, and depth rather than relying on weight alone. If the bait stays above the target zone, add a small shot.
Likewise, remove weight when the bait sinks too quickly or repeatedly contacts the bottom. These adjustments help maintain a controlled presentation throughout the session.
- Add weight: When current pushes the bait away from the target depth.
- Remove weight: When the bait sinks too aggressively.
- Move weight: When bait movement needs a more natural profile.
- Spread weight: When you need a slower, controlled descent.
Common Mistakes to Avoid
Many anglers squeeze split shot too tightly because they want maximum security. That approach can damage the line and create an unnecessary failure point.
Another common mistake involves adding too much weight immediately. Instead, make one small adjustment at a time and observe the resulting bait behavior.
Do Not Ignore Line Damage
Check the line whenever you move or remove a split shot. Small abrasions can become serious weaknesses after repeated casting and fighting fish.
If the line looks damaged, cut away the affected section and retie the connection. A fresh connection costs little compared with losing a fish.
How to Remove Split Shot Safely
Do not crush the weight repeatedly while trying to remove it. Excessive pressure can damage the fishing line beneath the shot.
Instead, use suitable split shot removal pliers when available. Open the weight carefully, then slide it away from the line without dragging it aggressively.
Store and Reuse Your Fishing Weights
Keep unused split shot organized by size so you can make faster rig adjustments. A small tackle compartment prevents weights from mixing with hooks and swivels.
After fishing, inspect reusable weights for deformation or corrosion. Replace damaged pieces because inconsistent shapes can affect attachment and performance.
Build a Simple Split Shot Rig
A basic split shot rig requires only fishing line, a suitable hook, bait, and one or more split shots. Tie the hook first, then attach the weight above it.
Start with one small shot and test the presentation. From there, add or reposition weights until the bait reaches your intended zone naturally.
Basic Setup
- Tie your selected hook to the fishing line.
- Attach one small split shot above the hook.
- Check the line for damage or excessive compression.
- Test the bait’s sinking speed near the fishing area.
- Add or reposition weight when the presentation needs adjustment.
How to Use Split Shot for Finesse Presentations
Finesse fishing often rewards subtle movement rather than aggressive weight. Therefore, start with the smallest shot that reaches your intended depth.
Additionally, spacing multiple small shots can create smoother bait movement. This setup gives you more control than attaching one unnecessarily heavy weight.
When Split Shot May Not Be the Best Option
Split shot works well for light and moderate adjustments, but some situations require different sinker designs. Deep water, heavy current, or specialized rigs may need dedicated terminal tackle.
Likewise, avoid forcing split shot onto line sizes outside its intended range. Always consider the line diameter, weight design, and fishing technique together.
Quick Troubleshooting Guide
| Problem | Likely Cause | Practical Fix |
|---|---|---|
| Weight slides | Insufficient clamping | Reattach with controlled pressure |
| Line looks flattened | Excessive pressure | Replace damaged line section |
| Bait sinks too fast | Too much weight | Remove or reduce one shot |
| Bait stays too shallow | Insufficient weight | Add a small shot |
| Bait moves unnaturally | Poor weight placement | Move weight farther from the hook |
Final Tips for More Consistent Results
Successful split shot fishing depends more on controlled adjustments than maximum weight. Start light, test often, and respond to what your rig does underwater.
Most importantly, protect your fishing line during every adjustment. Use Sanweal split shot weights as a tuning tool, not simply as extra mass.
Before your next fishing trip, organize several sizes in your tackle box and practice attaching them. Then, test different positions so you can adjust quickly when water conditions change.
Frequently Asked Questions
How do you attach Sanweal split shot fishing weights?
Place the line inside the split and gently clamp the weight until it holds securely without damaging the line.
Where should split shot weights go on fishing line?
Place them closer to the hook for faster sinking or farther away for gentler bait movement.
Can you use multiple split shot weights?
Yes, multiple small shots can provide finer control over sinking speed and bait depth.
Can split shot damage fishing line?
Yes, excessive clamping pressure can flatten or weaken some fishing lines.
How do you remove split shot weights?
Use suitable split shot removal pliers and open the weight carefully before sliding it away from the line.
Conclusion
Sanweal split shot fishing weights give anglers a practical way to control bait depth and sinking speed. Start with minimal weight, attach it carefully, and make small adjustments based on water conditions.
Before casting, inspect your line and test the rig near the fishing area. With consistent placement and careful pressure, you can make faster rig changes while protecting your line.